

Frying chicken can be one of the most satisfying cooking adventures—if done right. Whether you’re trying to whip up golden-brown drumsticks for family dinner or craving a crispy snack, the results can be delicious. But here’s the thing—it’s surprisingly easy to mess up. From soggy crust to undercooked centers, many issues can arise if you’re not careful.
This guide focuses on what not to do when frying chicken, covering everything from preparation to frying techniques. We’ll uncover the most common mistakes, why they happen, and, of course, how to avoid them. By the end, you’ll feel confident enough to fry chicken like a pro—without the headaches of trial and error. So, let’s dive in and get to the good stuff!
Choosing the Wrong Oil: A Common Frying Chicken Error
Why Oil Selection Matters in Frying Chicken Tips
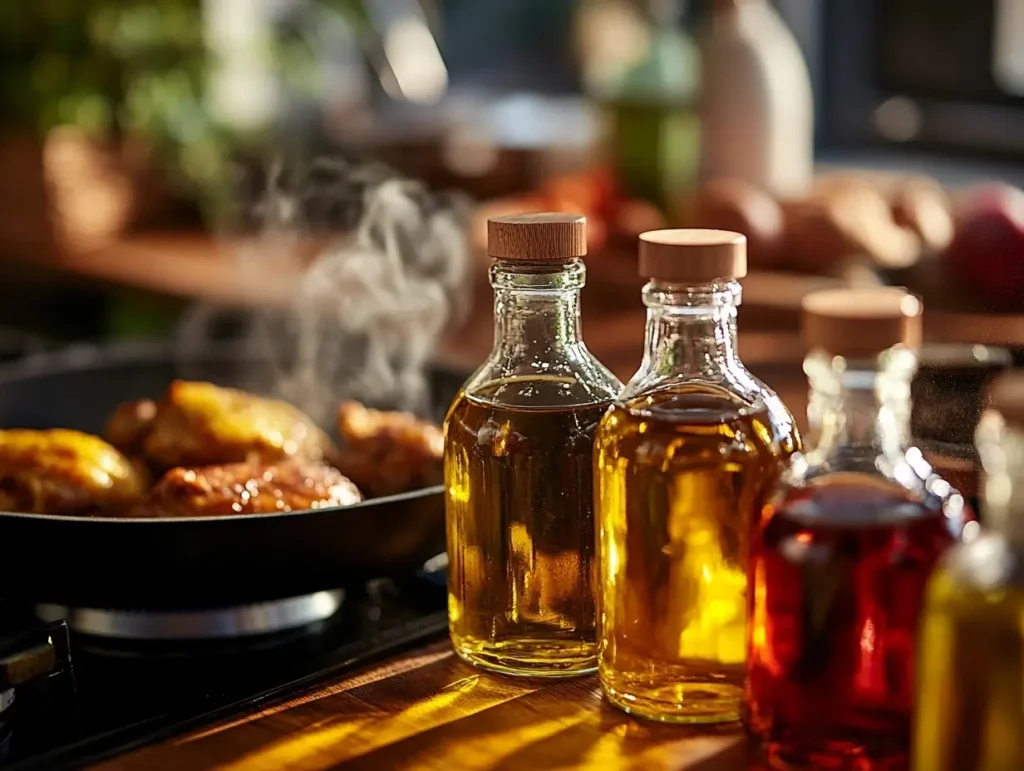
When it comes to frying chicken, one of the most overlooked mistakes is choosing the wrong oil. The oil you use isn’t just about adding flavor—it directly impacts the cooking temperature, texture, and overall outcome of your chicken.
Some oils, like olive oil or butter, might seem like a tasty choice, but they have a low smoke point. This means they burn quickly when exposed to high heat, which is essential for frying chicken. Burnt oil leaves you with bitter chicken and a smoky kitchen—a double disaster. Instead, opt for oils with high smoke points, such as peanut oil, canola oil, or vegetable oil. These oils are stable at high temperatures and help create that golden, crispy crust without burning.
Using butter for frying chicken is another big mistake to avoid. While butter adds flavor, it burns almost immediately, leaving you with more smoke and scorched bits than actual fried chicken. Stick to the right oil, and you’ll dodge one of the most common frying chicken errors.
If you’re curious about the healthiest cooking oils and their benefits, check out this helpful guide on choosing the best cooking oils for frying. It offers insights into which oils are best for different types of cooking, including frying.
Reusing Old Oil: How Not to Fry Chicken
Let’s talk about another frying chicken common issue: reusing old oil. At first glance, saving leftover oil from a previous fry might seem economical, but it can wreak havoc on your next batch of chicken. Why? Old oil absorbs flavors and odors from whatever was fried before. Imagine frying fresh chicken in oil that still carries the taste of fish or burnt crumbs—yikes!
Reused oil also degrades over time, losing its ability to heat evenly. This results in unevenly cooked chicken—some parts might be overdone, while others are undercooked. Plus, using old oil often leaves an unpleasant aftertaste, which ruins the entire experience.
To avoid this, always start with clean, fresh oil for frying. Your chicken deserves it, and so does your taste buds!
By paying attention to the type and quality of oil you use, you’ll avoid one of the biggest mistakes to avoid when frying chicken and enjoy a crispy, delicious result every time.
Not Controlling the Oil Temperature: A Key Frying Chicken Error
Consequences of Incorrect Temperature: How Not to Fry Chicken
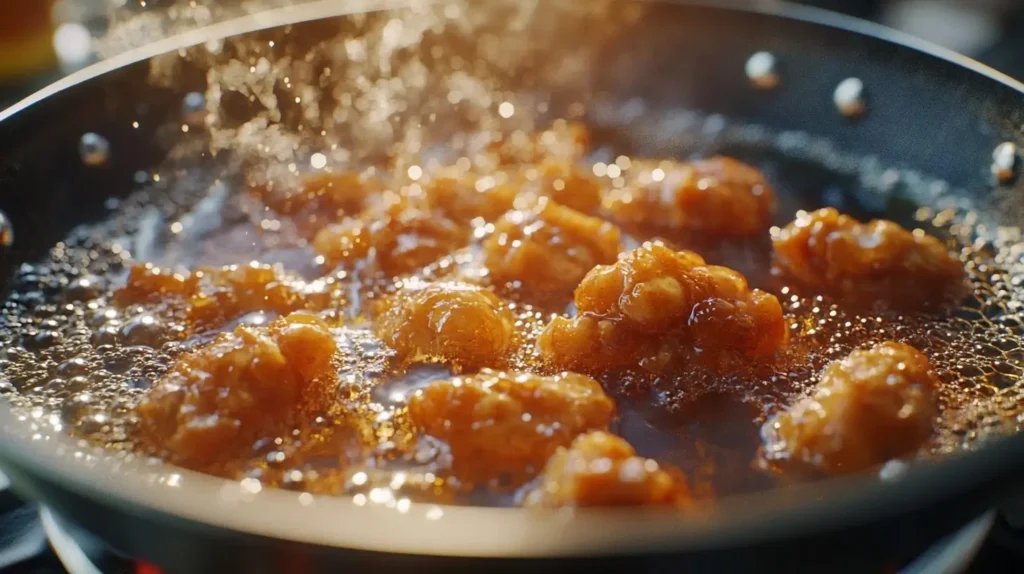
One of the biggest mistakes to avoid when frying chicken is ignoring the oil’s temperature. Get this wrong, and your chicken can swing between two extremes—either greasy and soggy or charred on the outside and raw on the inside. And let’s be real, neither of those results is what you’re going for!
If your oil is too cold, the chicken will soak up the grease like a sponge. The low temperature won’t crisp up the breading, leaving you with a heavy, oily mess. On the other hand, if the oil is too hot, the outer crust will cook (or worse, burn) before the meat inside has time to reach a safe internal temperature of 165°F (74°C). The sweet spot? Maintaining an oil temperature between 325°F and 375°F (160°C and 190°C) ensures that your chicken cooks evenly, developing a perfectly crispy crust and fully cooked meat.
Skipping the step of checking the temperature is a surefire way to ruin your chicken. Don’t leave it up to chance, or you’ll end up with greasy disasters or charred regrets—two frying chicken common issues that are easily preventable.
How to Monitor the Temperature: Essential Frying Chicken Tips
Here’s a simple truth: eyeballing the oil’s temperature is one of the fastest ways to sabotage your chicken. What looks “hot enough” might actually be far too cold or dangerously hot. That’s why investing in a reliable kitchen thermometer is non-negotiable. It’s worth every penny because it ensures precision, and precision is the secret to consistently good fried chicken.
A thermometer will help you keep the oil within the ideal range of 325°F to 375°F. It also alerts you when the oil temperature drops after adding chicken to the pan (which it inevitably will). Adjust the heat as needed to maintain the right temperature throughout the frying process.
And here’s a bonus tip: don’t overcrowd the pan. Adding too many chicken pieces at once cools down the oil dramatically, making it harder to recover the right frying temperature. Fry in small batches to keep the oil steady and ensure each piece gets the crispy, golden treatment it deserves.
By staying on top of the oil temperature, you’ll avoid one of the most common frying chicken errors and end up with consistently delicious results. Don’t leave this to guesswork—your chicken will thank you!
Skipping the Marinade or Brine: A Critical Frying Chicken Common Issue
Why Marinades and Brines Are Crucial: Avoid Dry and Bland Fried Chicken
Ever taken a bite of fried chicken and thought, “Why is this so dry?” or “Where’s the flavor?” Well, skipping the marinade or brine is often to blame. This is one of the biggest frying chicken errors home cooks make, and it’s surprisingly easy to fix.
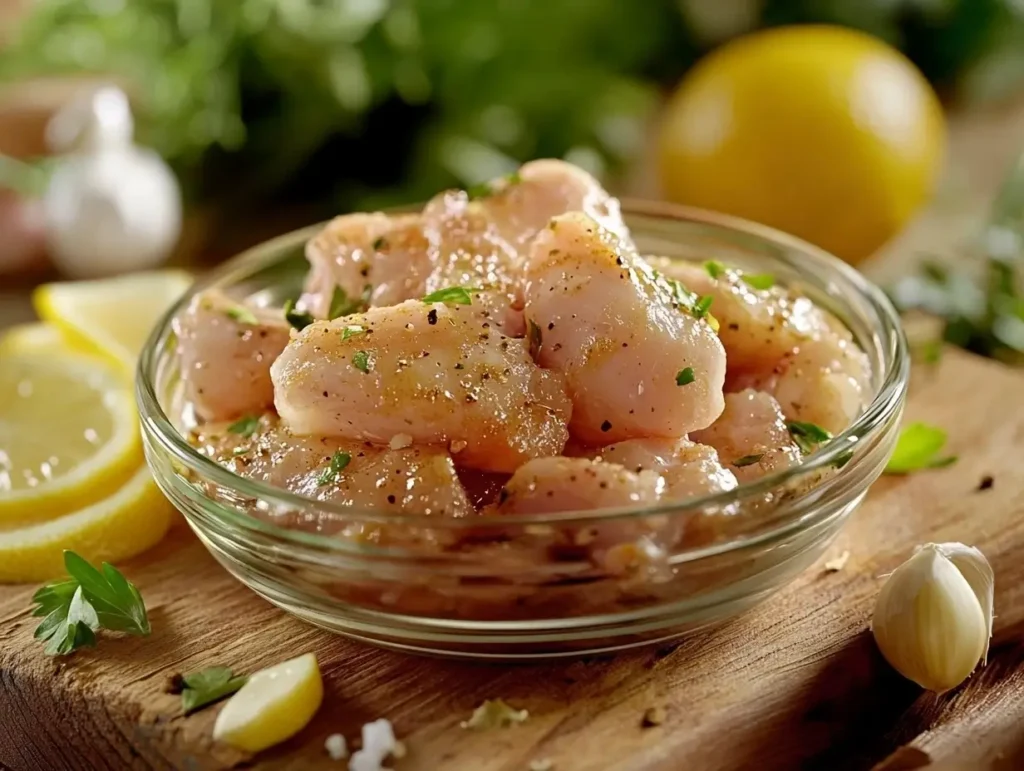
Marinades and brines are like the secret handshake of the frying world—they lock in moisture and infuse flavor deep into the meat. For a simple marinade, a mix of olive oil, lemon juice, and herbs can do wonders for flavor. But when it comes to frying chicken, nothing beats a buttermilk brine. The acidity in buttermilk works to break down the proteins in chicken, making it incredibly tender and juicy. Plus, it helps the breading adhere better, which means a crispier crust that stays put during frying.
Skipping this step? You’re setting yourself up for chicken that’s dry and flavorless, no matter how good your breading is. A proper brine or marinade is the foundation of great fried chicken—it’s not just an extra step; it’s a must.
Not Letting Chicken Rest After Brining: How Not to Fry Chicken
Even if you’ve nailed the marinade or brine, there’s another mistake you’ll want to avoid—skipping the resting period. Many cooks rush straight from the brine to the frying pan, but this can ruin all your hard work.
Resting after brining is essential because it gives the chicken time to fully absorb all the flavors from the marinade. Without rest, the seasoning stays on the surface, leaving the interior of the meat bland. Additionally, not allowing the chicken to rest can lead to uneven texture—parts of the chicken may feel tough while others are too soft.
Pro tip: Once you’re done brining, pat the chicken dry with paper towels to remove excess moisture. This ensures your breading sticks evenly, and it prevents soggy patches from forming during frying. It may take an extra 10–15 minutes, but trust me, the results are worth it. A little patience can turn your fried chicken from mediocre to absolutely mouthwatering.
By understanding the importance of marinades, brines, and rest time, you’ll avoid one of the most common mistakes to avoid when frying chicken and take a huge step toward achieving crispy, flavorful perfection.
Improper Seasoning: A Common Frying Chicken Error
Under-Seasoning the Flour Mixture: Mistakes to Avoid When Frying Chicken
There’s nothing more disappointing than biting into a beautifully crispy piece of fried chicken only to realize… it tastes boring. Bland fried chicken is often the result of one of the most overlooked frying chicken common issues: under-seasoning the flour mixture.
The flour coating isn’t just there for crunch—it’s a key player in flavoring your fried chicken. Simply relying on salt? That’s not enough. A good flour mixture needs a balanced blend of spices like paprika for smokiness, garlic powder and onion powder for depth, and just a touch of cayenne for a little kick. These ingredients bring the seasoning to life and complement the chicken’s natural flavor.
But here’s the trick: the flour mixture should taste good on its own. Before coating the chicken, sprinkle a pinch of the seasoned flour onto your tongue (don’t worry, this happens before the chicken touches it). If it tastes bland, add more seasoning. A well-seasoned breading makes the difference between fried chicken that’s just okay and fried chicken that’s downright irresistible.
Overloading on Spices: How Not to Fry Chicken
While under-seasoning can leave your fried chicken bland, overloading on spices can cause an entirely different disaster. Dumping too much cayenne, black pepper, or even salt into your breading mix can overpower the chicken’s natural flavor. Worse still, spices like cayenne can scorch during frying, leaving your chicken with a burnt, bitter aftertaste.
Remember, seasoning should enhance the chicken, not mask it. Aim for harmony—combine bold flavors with subtler ones to create a balanced profile. Think of it like a symphony: each spice plays its part, but none should dominate.
And don’t forget to account for brining or marinating! If your chicken has already been brined in a salty mixture, be mindful of the salt in your flour blend to avoid an overly salty result.
By avoiding both extremes—under-seasoning and overloading—you’ll dodge one of the most common frying chicken errors and create fried chicken that’s packed with flavor and perfectly balanced in every bite. Seasoning truly is an art, and when done right, it brings out the very best in your fried chicken.
Overcrowding the Pan
Why Overcrowding is a Problem
It’s tempting to toss all your chicken pieces into the pan at once, especially when you’re in a rush or cooking for a crowd. But overcrowding the pan is one of the biggest mistakes you can make when frying chicken. Here’s why: when you cram too many pieces into the pan, the oil temperature drops significantly. And when the oil isn’t hot enough, the chicken absorbs more grease, leaving you with a soggy, oily crust instead of that coveted crunch.
Even worse, overcrowding leads to uneven cooking. The chicken pieces block each other from frying properly, causing some parts to cook faster while others remain raw. This not only messes with the flavor and texture but also creates a food safety risk if parts of the chicken aren’t fully cooked.
How to Avoid Overcrowding
The solution? Fry in batches. It might take a little longer, but the results are worth it. Proper spacing ensures that each piece of chicken gets enough hot oil circulating around it for even cooking.
When choosing a pan, go for a deep skillet or a Dutch oven with plenty of surface area. A 12-inch cast iron skillet is ideal for frying a few pieces at a time, while larger pots work best for bigger batches. If you’re unsure, remember: it’s better to fry fewer pieces at once and get them right than to overcrowd and end up with a soggy disaster.
Neglecting to Drain Excess Oil
Using the Wrong Tools to Drain
After all that effort frying your chicken to crispy perfection, the last thing you want is to ruin it during the draining process. Many home cooks grab paper towels to drain excess oil, but here’s the issue: paper towels trap steam. This steam softens the crispy crust you worked so hard to achieve. What a waste, right?
Instead, use a wire rack placed over a baking sheet. A wire rack allows the oil to drip away without trapping steam, preserving the chicken’s crunch. Bonus: it also prevents the chicken from sitting in pooled oil, which can make the bottom soggy.
Why Draining Properly is Essential
Draining fried chicken properly isn’t just about appearance—it’s also about taste. Excess oil makes the chicken feel greasy and heavy, masking the flavor of the spices and breading. It also makes reheating leftovers a nightmare, as the oil can congeal into an unappetizing coating.
So, take the time to drain your chicken the right way. A few extra minutes on a wire rack will keep your crust crispy and your flavors intact. Trust me, your taste buds (and your guests) will thank you!
Cutting into the Chicken Immediately
Why Resting is Important
You’ve just pulled your fried chicken out of the oil, and it looks incredible—golden brown, crispy, and mouthwatering. But hold on! Cutting into it right away might feel irresistible, but it’s a big mistake. Why? Because the juices inside the chicken need time to redistribute.
When chicken is fresh out of the fryer, its juices are concentrated in the center due to the high cooking temperature. Cutting into it immediately allows those juices to spill out, leaving your chicken drier than it should be. And nobody wants dry chicken, right?
The solution is simple: let your chicken rest for about 5 to 10 minutes after frying. Place it on a wire rack to keep it crisp while allowing the juices to settle. This small pause ensures every bite is moist, flavorful, and worth the wait. A little patience here goes a long way toward turning good fried chicken into truly great fried chicken.
Storing Fried Chicken Incorrectly
Maintaining Crispiness for Leftovers
When it comes to leftovers, fried chicken can be tricky. Improper storage often leads to soggy crusts, which defeats the whole purpose of frying in the first place. The key to keeping your fried chicken crispy is to let it cool completely before storing it. Placing warm chicken into a container traps steam, softening the coating.
For reheating, skip the microwave—it’ll turn your crust into rubber. Instead, use an oven or air fryer to warm up the chicken. Set the oven to 375°F, place the chicken on a wire rack, and heat for about 10-15 minutes. This method brings back the crunch without overcooking the meat.
Avoiding Refrigeration Mistakes
Another common mistake is storing fried chicken in a non-airtight container or wrapping it directly in foil. Without proper sealing, the chicken dries out quickly in the fridge. On the flip side, an airtight container keeps the chicken moist and prevents it from absorbing unwanted fridge odors.
When freezing leftovers, wrap the chicken tightly in plastic wrap before placing it in a freezer-safe bag. This keeps ice crystals from forming, which can ruin the texture during reheating. These simple steps will ensure your fried chicken tastes just as good the next day—or even a week later!
Tricks to Avoid Soggy Chicken
One of the biggest disappointments in frying chicken is ending up with a soggy crust. While frying chicken might seem straightforward, a few simple tweaks can make all the difference in achieving that golden, crispy coating you’re dreaming of.
Using cornstarch or rice flour in your breading mix is a game-changer. Cornstarch creates a light, airy crust that stays crunchy even after cooling, while rice flour adds an extra crispness that’s hard to beat. You can replace a portion of the regular flour with these ingredients or use a mix of all three. This simple adjustment can take your fried chicken to the next level.
Another tried-and-true method is double frying. It may sound fancy, but it’s surprisingly easy. Fry the chicken once at a slightly lower temperature to cook the meat through, then let it rest briefly. Afterward, fry it again at a higher temperature to achieve that irresistible crispy exterior. The result? Fried chicken that stays crunchy longer and has that satisfying crackle in every bite.
If you’ve struggled with soggy fried chicken in the past, these tricks are worth trying. You’ll be amazed at the difference small changes can make!
Timing Is Everything
When frying chicken, timing isn’t just important—it’s everything. Rushing through preparation or leaving fried chicken sitting out for too long can spell disaster. Timing affects every step of the process, from seasoning to frying and even serving.
Proper meal prep is your best ally. For instance, brine your chicken in advance to ensure maximum flavor and tenderness. Similarly, set up your breading station before heating the oil so you’re not scrambling at the last minute.
Here’s a quick breakdown of the ideal timing for each stage of frying chicken:
| Step | Recommended Time | Why It Matters |
|---|---|---|
| Brining/Marinating | 4–24 hours | Adds moisture and flavor to the chicken. |
| Letting Chicken Rest | 10–15 minutes after brining | Allows seasoning to soak in and meat to stabilize. |
| Frying First Batch | 12–15 minutes at 325°F-350°F | Cooks the meat thoroughly without burning the crust. |
| Double Frying (Optional) | 2–3 minutes at 375°F | Ensures extra crunch and helps maintain crispiness. |
| Resting After Frying | 5–10 minutes on a wire rack | Retains juices and prevents sogginess from steam. |
By mastering your timing, you’ll not only improve the flavor and texture of your fried chicken but also reduce stress in the kitchen. Good preparation ensures the chicken is cooked and served at its very best.
Frequently Asked Questions
Frying chicken can be a bit intimidating, but the more you know, the easier it becomes. Here are answers to some of the most common questions to help you perfect your fried chicken game.
What is the best oil for frying chicken?
The key to perfect fried chicken is using the right oil. Oils with high smoke points and neutral flavors are the best choices. Peanut oil, canola oil, and vegetable oil are all excellent options because they can withstand the high temperatures needed for frying without burning. Avoid oils like olive oil or butter, as they have low smoke points and can ruin your chicken’s taste.
How do I know when the chicken is done?
The best way to ensure your chicken is cooked is by using a meat thermometer. Insert it into the thickest part of the chicken (not touching the bone)—the internal temperature should reach 165°F (74°C). If you don’t have a thermometer, look for visual cues: the juices should run clear, and the meat near the bone should no longer be pink.
Does butter or oil make chicken crispier?
Oil is the better choice for achieving crispy fried chicken. Butter has a low smoke point and tends to burn before the chicken is fully cooked. If you want that buttery flavor, consider adding melted butter after frying or as part of a dipping sauce.
If crispy skin is what you’re after, don’t miss What is the Trick to Getting Crispy Chicken? A Step-by-Step Guide for Perfect Crunch, where you’ll find a detailed guide to mastering that crunch.
What is the secret to good fried chicken?
The “secret” to great fried chicken lies in preparation. Brining or marinating keeps the meat juicy, while a well-seasoned breading ensures a flavorful crunch. Maintaining the right oil temperature throughout frying (325°F–375°F) is crucial to achieving an even, crispy crust without overcooking the meat.
For an in-depth breakdown of every step, you can refer to The Ultimate Guide to the Secret of Good Fried Chicken, which provides a comprehensive approach to mastering this dish.
What is the trick to getting crispy chicken?
Two things: cornstarch and double frying. Adding cornstarch or rice flour to your breading mixture creates a lighter, crispier texture. Double frying—cooking at a lower temperature first, then finishing at a higher temperature—seals in the crunch and prevents sogginess.
How to pan fry chicken sausage?
To pan-fry chicken sausage, heat a skillet over medium heat with a small amount of oil. Add the sausages and cook for 4–6 minutes per side until golden brown. Use a meat thermometer to ensure the internal temperature reaches 165°F (74°C) for fully cooked sausages.
How long to pan fry boneless chicken thighs?
Boneless chicken thighs typically take about 6–8 minutes per side to pan fry over medium-high heat. However, cooking time can vary based on thickness. Always check for an internal temperature of 165°F (74°C) for safety and perfect doneness.
Why soak chicken in milk before frying?
Soaking chicken in milk (or buttermilk) before frying serves two purposes. The milk tenderizes the chicken, breaking down proteins for a juicier result. It also helps the breading stick better, ensuring a more even and crispy coating.
Is it better to pan fry chicken in butter or oil?
Oil is the better choice for pan frying chicken because of its high smoke point. Butter tends to burn quickly, which can leave a bitter taste and ruin the chicken’s crispiness. For extra flavor, you can finish the chicken by adding a small amount of butter toward the end of cooking.
Check out Does Butter or Oil Make Chicken Crispier? The Ultimate Guide to Perfect Crispy Chicken for a full comparison.
Mastering the Art of Fried Chicken
Fried chicken is one of those dishes that has the power to delight anyone lucky enough to dig into it. But let’s face it—getting it just right can feel like a juggling act. Between choosing the right oil, keeping an eye on temperatures, and avoiding soggy crusts, there’s a lot that can go wrong. Thankfully, with the tips and tricks outlined in this guide, you’re now equipped to avoid the most common mistakes when frying chicken.
To recap, some of the biggest mistakes to steer clear of include:
- Choosing the wrong oil or reusing old oil, which affects flavor and texture.
- Skipping the marinade or brine, robbing your chicken of moisture and flavor.
- Overcrowding the pan, leading to soggy, unevenly cooked chicken.
- Neglecting to drain excess oil properly, which compromises crispiness.
- Rushing to cut into the chicken or storing it improperly, ruining all your hard work.
The solutions are simpler than you might think: use oils with high smoke points, brine your chicken for juicy results, fry in small batches, and always drain on a wire rack. And don’t forget to let your chicken rest before serving!
Fried chicken perfection isn’t achieved overnight—it takes practice, patience, and a willingness to tweak your methods as you go. Don’t be discouraged if your first attempt isn’t flawless. With the knowledge you’ve gained here, each batch will be better than the last.
So, what are you waiting for? Fire up that skillet, grab your favorite seasonings, and put these tips to use. The road to consistently delicious fried chicken is now wide open. And the best part? Every step along the way will be finger-licking good!