
Should I bake the bottom pie crust first? This is a common question among bakers striving for the perfect pie. The crust plays a crucial role in achieving the ideal texture, as a soggy or undercooked bottom can ruin the entire experience, no matter how delicious the filling is.
Some pies, like custard and cream pies, require a crisp foundation that can only be achieved by pre-baking the crust. Others, like fruit pies, rely on the filling’s moisture and longer baking time to cook the crust properly. Understanding the when and how of blind baking ensures your pie crust turns out flaky, golden, and never soggy. For a simple and flavorful approach to making mini chicken pot pies, don’t miss this detailed recipe on mini chicken pot pies, which offers step-by-step instructions and tips.
In this guide, we’ll explore the concept of blind baking, when it’s necessary, and how to do it correctly. We’ll also cover common mistakes to avoid so that your pies always come out of the oven with the perfect texture. Whether you’re making a classic pumpkin pie or a silky chocolate tart, getting the crust right is the key to a show-stopping dessert.
What is Blind Baking a Pie Crust?
Definition and Purpose of Pre-Baking a Pie Crust
Blind baking, also known as pre-baking a pie crust, par-baking a pie crust, or baking the pie shell before filling, is the process of partially or fully baking the crust before adding any filling. This technique is crucial for pies with no-bake or slow-cooking fillings, as it prevents the crust from turning soft and unappetizing.
The main purpose of preparing the bottom crust for pie before filling is to create a strong foundation that resists moisture absorption. Whether the crust is partially baked or fully pre-baked, this step ensures that the pie maintains its texture and structure. A well-executed blind baked crust prevents the dreaded soggy bottom, allowing for a crisp, golden, and flaky bite.
Historical Context of Baking a Pie Shell Before Filling
Blind baking has been an essential pastry technique for centuries. Early European bakers discovered that pre-baking a pie crust helped prevent delicate custard and fruit fillings from soaking into the dough. Classic French tarts, English custard pies, and traditional quiches all rely on baking the pie shell before filling to achieve the perfect consistency.
Before modern pie weights, bakers used dried beans, rice, or even small metal chains to keep the crust from puffing up or shrinking. Today, ceramic or metal pie weights are commonly used to maintain the dough’s shape during baking. Understanding this time-honored method can help home bakers avoid common pie-making mistakes while achieving a crisp and well-structured crust.
When Should You Pre-Bake the Bottom Pie Crust?
Pies Requiring Blind Baking a Pie Crust
Some pies absolutely require pre-baking the pie crust to ensure it is crisp and fully cooked before adding the filling. These include:
- Custard pies – Pies like pumpkin pie, pecan pie, and chess pie contain liquid-based fillings that need a fully baked pie shell to prevent a soggy bottom.
- Cream pies – Since pies like banana cream pie or coconut cream pie have no-bake fillings, the crust must be completely baked beforehand.
- Quiches – The rich, egg-based filling in a quiche requires a par-baked pie crust to prevent it from turning rubbery.
Pies That Do Not Require Baking the Pie Shell Before Filling
Not all pies need a pre-baked crust. If the filling and crust bake together, blind baking may not be necessary. Examples include:
- Double-crust fruit pies – Pies like apple pie, cherry pie, and blueberry pie have long baking times, allowing the bottom crust to cook naturally along with the filling.
- Savory pot pies – These hearty dishes bake with the filling, allowing moisture to escape and develop a firm crust without needing to be pre-baked.
Knowing when to par-bake the pie crust helps save time while ensuring your pies turn out crisp and perfectly textured.while ensuring the best results for your favorite pies.
Benefits of Blind Baking the Bottom Pie Crust
Preventing a Soggy Bottom
Nobody likes a pie with a limp, mushy base. When a wet filling sits on raw dough, the moisture seeps in, leaving you with an unappetizing mess. Blind baking creates a barrier between the filling and the crust, ensuring that the pie stays firm and holds its shape.
Excess moisture is one of the biggest culprits behind a soggy crust. When liquids seep into the dough, it loses its structure and turns limp. Proper blind baking helps create a barrier against moisture, keeping the crust crisp and firm. According to Healthline, controlling moisture content in foods plays a crucial role in achieving the desired texture and preventing excess sogginess in baked goods.
Achieving a Crisp and Flaky Texture
One of the hallmarks of a great pie is a crust that’s buttery, flaky, and crisp. If the dough is not baked properly, it can become tough or gummy, ruining the overall texture. Blind baking helps set the fat in the dough, locking in the structure needed for a beautifully crisp bite.
When done correctly, this method results in a golden-brown crust with delicate layers that break apart perfectly with a fork. Whether you’re making a cream pie, a fruit tart, or a quiche, blind baking ensures that your crust remains tender, flaky, and irresistibly good.

Step-by-Step Guide to Blind Baking a Pie Crust
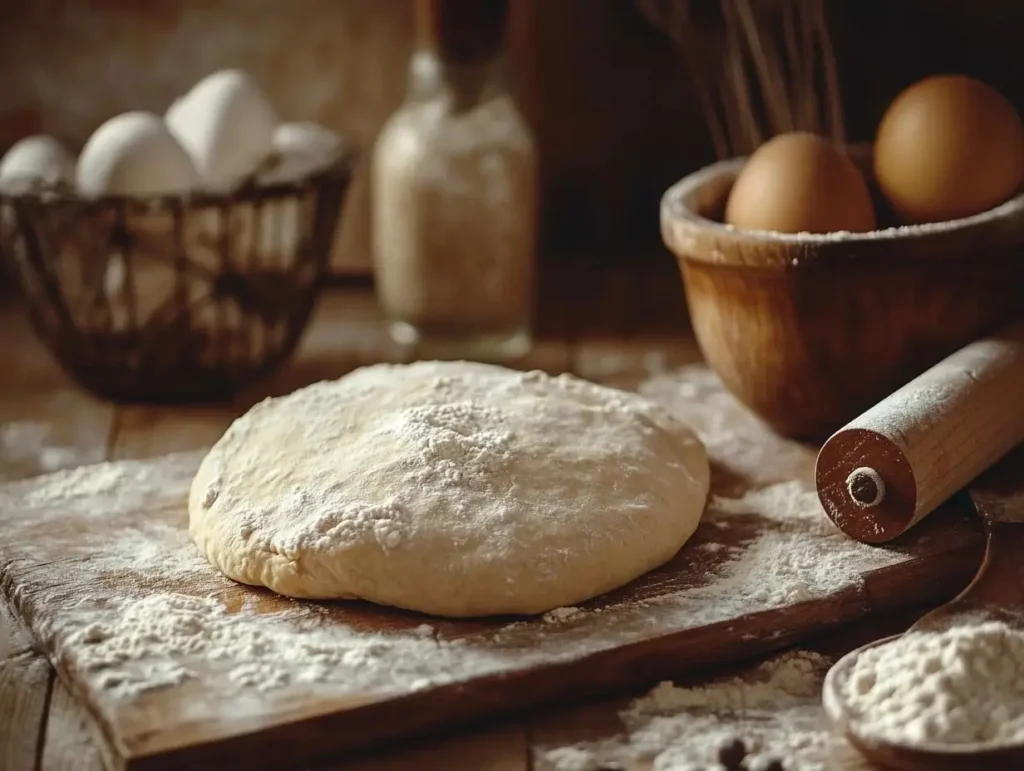
Preparing the Dough for Pre-Baking
Start with well-chilled dough, as this makes it easier to roll out and prevents excessive shrinking during baking. Lightly flour your work surface and roll the dough to about 1/8-inch thickness. Carefully transfer it to your pie dish, pressing it gently into the edges without stretching—this helps prevent shrinkage.
Trim any excess overhang, leaving about half an inch to crimp or shape as desired. For an extra layer of protection against sogginess, some bakers brush a thin layer of egg wash or melted butter onto the crust before baking. This acts as a barrier to keep the filling from making the crust soft.
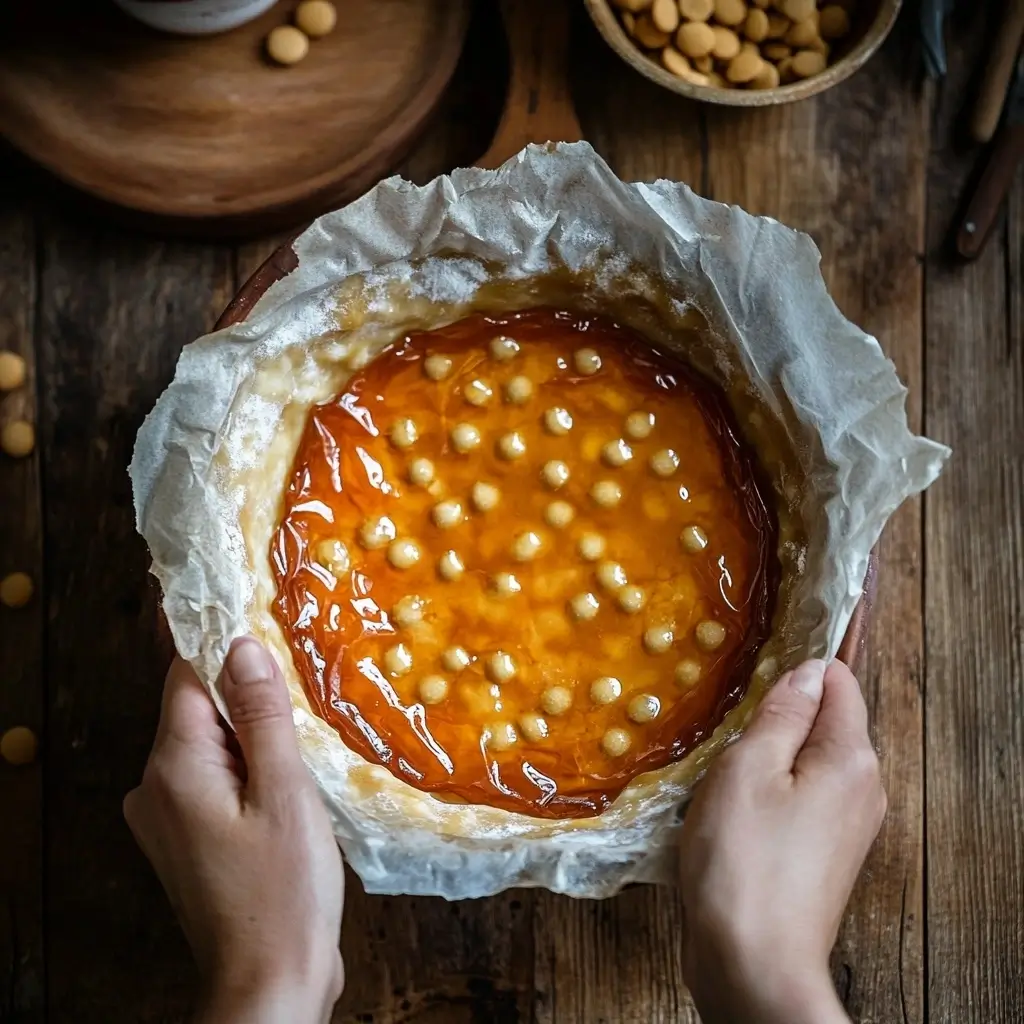
Using Pie Weights for Par-Baking the Pie Crust
Pie crusts tend to puff up or slump down while baking, which is why pie weights are essential when blind baking a pie crust. After placing the dough in the dish, line it with parchment paper or aluminum foil, making sure it covers the entire surface. Then, fill it with weights such as:
- Ceramic baking beads – Specially designed for blind baking a pie crust
- Dried beans or rice – Affordable and reusable alternatives
- Granulated sugar – Distributes weight evenly and caramelizes for future use
These weights press down on the dough, keeping it from bubbling or shrinking. Make sure they are evenly distributed so the crust bakes uniformly.
Baking Times and Temperatures for Pre-Baking a Pie Crust
The right temperature and timing depend on whether you need a partially baked or fully baked pie crust:
- For a partially baked crust: Bake at 375°F (190°C) for 12-15 minutes until the edges begin to turn golden. Remove the weights and parchment, then bake for another 5-7 minutes until the bottom looks dry but not fully browned.
- For a fully baked crust: After removing the weights, continue baking for another 12-15 minutes until the crust is evenly golden brown.
Allow the crust to cool slightly before adding your filling to prevent any steam from making it soggy. Following these steps ensures a crisp and flaky pie shell, ready for your favorite fillings.
Common Mistakes to Avoid During Blind Baking
Overbaking or Underbaking the Crust
Timing is everything! If you remove the crust from the oven too soon, it won’t have enough structure to hold the filling. On the other hand, baking it too long can make it hard and brittle, making it difficult to slice. The key is to follow the recommended baking times closely and look for visual cues, like a light golden color and a dry surface.
Another common mistake is assuming that all pies need the same amount of baking time. Depending on your filling, a crust that’s too dark or too pale could impact the final texture.
Not Using Pie Weights Properly
Skipping pie weights or using them incorrectly can lead to uneven baking, air pockets, or crust shrinkage. If you don’t line your crust with enough weight, it might puff up or slide down the sides, ruining its shape.
To avoid this, use a generous amount of weights and ensure they press firmly against the dough. If you don’t have official pie weights, dried beans or rice work just as well. Just remember—never bake with weights directly on the dough without parchment or foil, or they might stick!
Alternatives to Traditional Blind Baking
While blind baking with pie weights is the most common method for achieving a crisp, sturdy crust, it’s not the only way. If you don’t have pie weights on hand or want to try a different approach, there are a couple of effective alternatives that can help you get similar results.
Docking the Dough
Docking is a simple yet effective technique for preventing air bubbles and ensuring an even bake. Instead of weighing the crust down, you poke small holes across the surface of the dough using a fork before baking. These holes allow steam to escape, reducing the chances of the crust puffing up or shrinking unevenly.
How to dock a pie crust properly:
- Roll out and place your dough into the pie pan as usual.
- Use a fork to poke small holes across the bottom and sides of the crust.
- Bake as directed, keeping an eye on the crust to ensure it doesn’t overbrown.
This method works best for pies with dry or semi-dry fillings, such as savory tarts or quiches. However, if your filling is very liquid-based, docking alone may not provide enough structure, and blind baking with weights might still be the better option.
Using Alternative Weights
If you don’t have traditional ceramic pie weights, don’t worry—there are plenty of household items that work just as well:
- Dried beans or rice – Affordable and reusable, these make excellent substitutes. Just remember that once baked, they shouldn’t be cooked for eating.
- Sugar – This distributes weight more evenly and, when baked, can even be used for subtly flavored caramelized sugar.
- Pennies or metal chains – As long as they’re lined with parchment paper, small metal objects can work in a pinch.
Each of these alternatives helps keep the crust in place, ensuring a crisp and evenly baked base without requiring specialty tools.
Expert Tips for Perfect Pie Crusts
Even with the right techniques, a great pie crust depends on the ingredients and how you handle the dough. Here are two essential factors that can make or break your crust.
Choosing the Right Fat for Dough
The type of fat you use significantly impacts the texture, flavor, and flakiness of the crust. Below is a quick comparison of common fats used in pie dough:
| Fat Type | Texture | Flavor | Best Used For |
|---|---|---|---|
| Butter | Flaky, crisp | Rich, slightly sweet | All-purpose pie crusts, fruit pies |
| Shortening | Very tender | Neutral | Custard pies, decorative crusts |
| Lard | Extra flaky | Mild, slightly savory | Savory pies, traditional recipes |
| Oil | Less flaky | Light, neutral | Health-conscious alternatives |
Butter is often the preferred choice for its flavor and flakiness, but some bakers mix butter with shortening or lard to combine the benefits of both.
Proper Dough Handling Techniques
Handling pie dough correctly ensures it remains tender and easy to work with. Here are some crucial tips:
- Keep everything cold – Cold ingredients prevent the fat from melting too soon, creating a flaky texture.
- Use minimal handling – Overworking the dough develops gluten, making it tough. Mix until just combined.
- Chill before rolling – Refrigerate the dough for at least 30 minutes to relax the gluten and make rolling easier.
- Roll evenly – Roll from the center outward, rotating frequently to maintain an even thickness.
- Let the dough rest before baking – Chilling the shaped crust helps prevent shrinkage in the oven.
By using the right fat and handling techniques, you can achieve a tender, flaky crust that complements any filling.
Frequently Asked Questions (FAQs)
How do you keep the bottom crust of a chicken pot pie from getting soggy?
To prevent a soggy bottom, blind bake the crust before adding the filling. You can also brush the crust with a thin layer of egg wash before baking to create a barrier that repels moisture. Another trick is to use a metal or glass pie dish, which conducts heat well and helps crisp the bottom. A soft, undercooked crust can ruin a great chicken pot pie. Discover essential tricks to achieve a crispy bottom crust in this detailed guide.
Should I prebake the bottom crust for chicken pot pie?
It depends on personal preference and the recipe. While some recipes allow the crust to bake with the filling, pre-baking the crust ensures it stays crisp and sturdy. If you want a firmer bottom crust, partially blind baking before adding the filling is recommended. For a detailed breakdown of the pros and cons, check out Should I Prebake the Bottom Crust for Chicken Pot Pie?.
How do you get a crispy crust on the bottom of a pie?
Use a preheated baking sheet or pizza stone under your pie dish to promote even heat distribution. Brushing the crust with egg wash before baking and using a well-ventilated top crust or lattice design can also help reduce excess moisture. For more expert tips and techniques, check out How Do You Get a Crispy Crust on the Bottom of a Pie?.
How do you keep the bottom of a pot pie from getting soggy?
Aside from blind baking, make sure the filling isn’t too watery. Let the cooked filling cool slightly before adding it to the crust. This prevents steam from softening the dough before it bakes. For more expert tips and techniques, check out How to Keep the Bottom of a Pot Pie from Getting Soggy.
What to serve with mini chicken pot pies?
Mini chicken pot pies pair well with light sides like a fresh green salad, roasted vegetables, or mashed potatoes. A warm bowl of soup or garlic bread also complements the dish.
How to make mini chicken pot pies?
To make mini chicken pot pies, use small ramekins or muffin tins lined with pie dough. Fill them with a mixture of cooked chicken, vegetables, and a creamy sauce. Top with another layer of dough, crimp the edges, and bake until golden brown.
How long to bake mini chicken pot pies?
Bake mini chicken pot pies at 375°F (190°C) for about 25-30 minutes or until the crust is golden and the filling is bubbling. If using pre-cooked filling, you only need to bake until the crust is fully cooked.
Conclusion
Recap of the Importance of Blind Baking a Pie Crust
A great pie isn’t just about the filling—it’s about the entire experience, from the first bite to the last. Should I bake the bottom pie crust first? This question is crucial for any baker looking to achieve the perfect texture. Blind baking a pie crust plays a vital role in ensuring that your bottom crust stays crisp, firm, and never soggy. Whether you’re making a custard pie, a cream-filled tart, or a savory quiche, pre-baking a pie crust gives it the structure it needs to support your delicious fillings.
We’ve covered when and why blind baking a pie crust is necessary, how to do it step by step, and even alternatives for those who don’t have traditional pie weights. If you’ve ever asked yourself, “Should I bake the bottom pie crust first?”, the answer depends on your pie type, but following the right techniques guarantees the best results. By taking the extra step of pre-baking a pie crust, you can avoid common pitfalls like a collapsed crust, underbaking, or excess moisture ruining the texture.
Encouragement to Apply These Techniques
Many home bakers hesitate and wonder, “Should I bake the bottom pie crust first, or can I skip it?” Now that you have the answer, it’s time to put these skills into action. Try experimenting with different fats in your dough, test out docking or alternative weights, and practice getting that perfect golden crust.
Pie-making is an art, and with the right knowledge and a little practice, you’ll no longer have to wonder, “Should I bake the bottom pie crust first?”—you’ll already know what to do! So, grab your rolling pin and get started—your next masterpiece is waiting!