

Who doesn’t love the irresistible crunch of fried chicken paired with its juicy, tender meat? From Sunday dinners to street food stands, fried chicken is a dish that transcends borders and unites taste buds around the globe. But let’s be honest—achieving that golden, crispy crust while keeping the meat juicy is no walk in the park. It takes a bit of know-how, some trial and error, and, yes, a few tried-and-true secrets to get it just right.
In this guide, we’re going to spill the beans—or rather, the breadcrumbs—on what makes fried chicken truly extraordinary. From choosing the perfect cut to mastering the right frying techniques, you’ll find everything you need to know here. Whether you’re a beginner or a home-cooking pro, this is your ultimate roadmap to making fried chicken that rivals any restaurant’s version.
What Is the Secret to Good Fried Chicken?
If you’ve ever asked yourself what is the secret to good fried chicken, you’re in good company. This isn’t just a passing question—it’s a quest for crispy, tender perfection that chicken lovers around the world are constantly pursuing. The truth is, what is the secret to good fried chicken? It lies in balancing a few critical factors: marinating for flavor and tenderness, seasoning for a bold, mouthwatering taste, and frying at just the right temperature to achieve that iconic golden crunch.
Great fried chicken doesn’t just happen by chance. The answer to what is the secret to good fried chicken starts with proper preparation. When you marinate your chicken well, it stays juicy on the inside. Seasoning every layer ensures flavor penetrates the meat and the crust. Then comes frying at the perfect heat, which creates a crisp shell while keeping the meat cooked to perfection. Believe it or not, you don’t need expensive gadgets or professional training—just patience, practice, and a touch of technique.
Why Is Fried Chicken So Popular?
It’s no surprise that so many people wonder, what is the secret to good fried chicken? After all, fried chicken isn’t just a dish; it’s a global phenomenon. From Southern-style buttermilk fried chicken to Korean fried chicken with its sweet-and-spicy glaze, nearly every culture has its own take on this crispy, juicy classic. It’s versatile, comforting, and downright delicious.
Part of the magic of fried chicken lies in its ability to bring people together. Whether you’re enjoying a family dinner, sharing a bucket at a picnic, or indulging in homemade fried chicken on a quiet evening, it’s a meal that creates memories. Plus, its combination of crispy, crunchy textures and tender, juicy meat is completely addictive, making it a dish that keeps people coming back for more.
So, what is the secret to good fried chicken? It’s not just about technique—it’s about creating an experience. Whether it’s the crunch of the crust, the juiciness of the meat, or the joy of sharing it with loved ones, fried chicken has a way of turning a simple meal into something truly special.
Choosing the Right Chicken Cut for Crispy Fried Chicken
When it comes to making crispy fried chicken or golden crust fried chicken, selecting the right chicken cut is just as crucial as perfecting the cooking method. Each cut—be it juicy thighs, tender drumsticks, or crunchy wings—brings its own unique texture and flavor to the plate. But not all cuts perform equally well when it comes to frying, so understanding the strengths of each can help you create the perfect fried chicken.
Thighs, Drumsticks, and Wings: The Star Players of Homemade Fried Chicken
If you’re after bold flavor and tenderness, chicken thighs and drumsticks are the MVPs of buttermilk fried chicken. These dark meat cuts contain slightly higher fat content, keeping the meat juicy and tender even after frying. Plus, they’re more forgiving if you’re new to frying—dark meat can handle a little extra cooking time without drying out.
Wings, however, are the undisputed champions when it comes to achieving golden crust fried chicken. Thanks to their small size and high skin-to-meat ratio, wings fry up beautifully crispy. Whether you’re cooking up a plate for game night or experimenting with homemade fried chicken recipes, wings are a crowd favorite for that irresistible crunch.
Bone-In vs. Boneless Chicken for Perfect Fried Chicken
Ah, the age-old debate! Bone-in chicken is the traditional choice for homemade fried chicken, and there’s good reason for its popularity. The bones act as a natural insulator, helping the meat stay moist and flavorful as it cooks. Plus, let’s face it—there’s something about bone-in chicken that just feels more authentic when you’re making crispy fried chicken at home.
That said, boneless cuts like chicken tenders or breast strips have their own merits. They fry up faster and are easy to dip into sauces, making them a great choice for quick meals or kid-friendly options. However, they can dry out more quickly, so extra care is needed during frying.
For those craving the ultimate tender fried chicken experience, bone-in pieces are your best bet. But if convenience is your priority, boneless cuts might be the way to go. Either way, with the right marination and frying technique, you can achieve perfect fried chicken no matter what cut you choose.
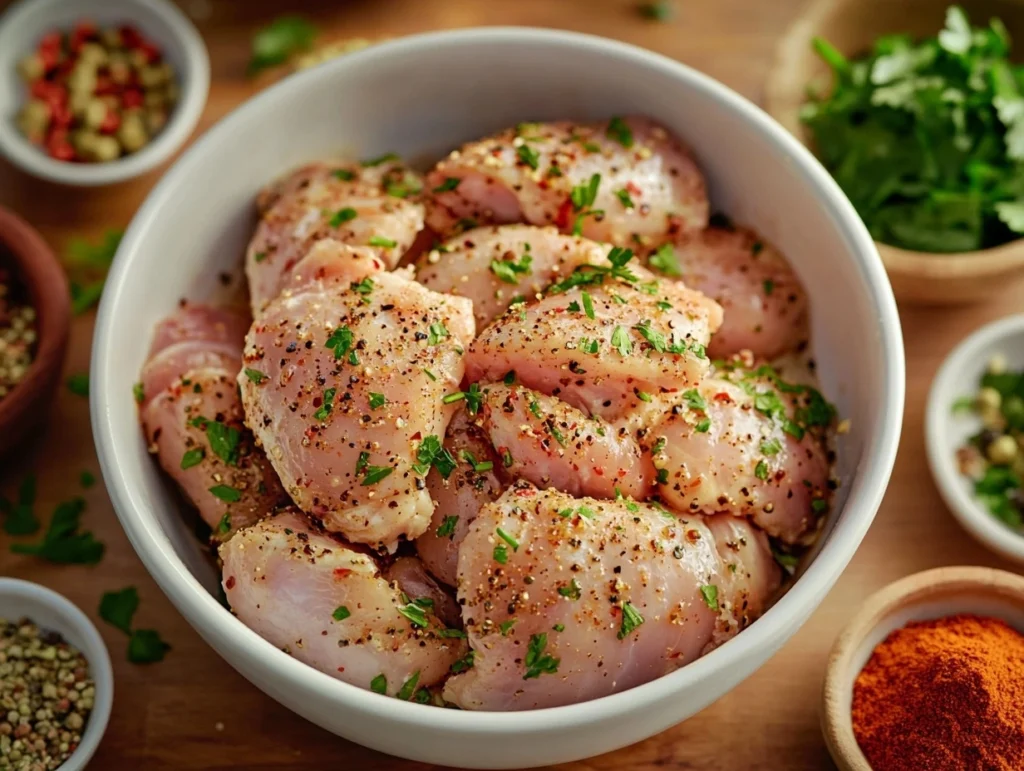
The Importance of Marination for Perfect Fried Chicken
Want your crispy fried chicken to pack a punch of flavor while staying juicy and tender? Marination is the not-so-secret ingredient that transforms ordinary chicken into perfect fried chicken. This step is about more than just taste—marination enhances texture, locks in moisture, and ensures every bite of your golden crust fried chicken is downright irresistible.
Buttermilk Brine: The Secret to Tender Fried Chicken
If there’s one marination method that’s a game-changer for buttermilk fried chicken, it’s soaking the chicken in buttermilk. This isn’t just a Southern tradition; it’s a science-backed technique for tenderizing the meat. Buttermilk’s mild acidity breaks down proteins in the chicken, resulting in meat that’s soft, juicy, and flavorful. (Learn more about the science behind marination here from Healthline.)
Here’s how to get the best results with a buttermilk brine:
- Marinate for at least 4 hours: This is enough time for the acid to do its work.
- Overnight is even better: For maximum tenderness and flavor, let the chicken soak in the fridge overnight.
- Season your buttermilk: Add spices like paprika, cayenne, garlic powder, and even a splash of hot sauce. This enhances the flavor of the chicken from the inside out.
The result? Chicken that’s crispy on the outside yet juicy and flavorful on the inside—a hallmark of perfect fried chicken.
Salt Brine for Maximum Juiciness in Homemade Fried Chicken
No buttermilk? No problem! A salt brine is another tried-and-true method for ensuring tender fried chicken. Salt works by drawing water into the chicken, keeping it moist even after the high-heat frying process. Plus, it enhances the natural flavor of the meat, making it a perfect base for crispy fried chicken recipes.
Here’s how to make a simple salt brine:
- Combine water, salt, and sugar (a ratio of 1 cup water, 1 tablespoon salt, and 1 tablespoon sugar works well).
- Optional: Add herbs like rosemary, thyme, or bay leaves, or even slices of citrus for extra flavor.
- Let the chicken sit in the brine for at least 30 minutes. If you have more time, brine for up to 4 hours for even better results.
While a salt brine doesn’t tenderize the meat the way buttermilk does, it ensures your chicken is juicy and flavorful throughout. Be cautious with the amount of salt you use, as you’ll be seasoning the chicken further when dredging and frying.
Whether you use a buttermilk brine or a salt brine, marination is non-negotiable for achieving the best homemade fried chicken. It’s the foundation of bold flavors, tender textures, and that irresistible juiciness that keeps everyone coming back for more. Ready to take your fried chicken to the next level? Up next, we’ll talk about seasoning—because great flavor starts with a well-crafted spice blend.
Crafting the Perfect Seasoning Blend
Marination sets the stage, but the seasoning is where your fried chicken gets its signature taste. A well-seasoned crust is what makes each bite a memorable one, and this is where you can let your creativity shine.
Classic Southern Spices
For a traditional flavor profile, stick with the tried-and-true Southern spice mix. Start with paprika, which adds a mild sweetness and that beautiful golden color. Then throw in a bit of cayenne for heat, garlic powder for depth, and black pepper for a bold kick. A pinch of dried thyme or oregano can add a subtle herbal note, while a touch of onion powder rounds out the blend.
Pro tip: Don’t just season your flour; season every layer! Add spices to your marination, dredging mix, and even your final flour coating. This ensures that every bite is packed with flavor, from the crispy crust to the tender meat inside.
Experimenting with Global Flavors
Why stop at classic Southern spices? Fried chicken is the perfect canvas for experimenting with flavors from around the world. Feeling adventurous? Try an Indian-inspired blend with turmeric, garam masala, and cumin for a vibrant, aromatic twist. Or go for a Korean-style kick with gochugaru (Korean chili flakes), ginger, and a splash of soy sauce in your marinade.
For something zesty and Mediterranean, combine oregano, lemon zest, and smoked paprika. If you’re craving bold, spicy flavors, a Jamaican jerk seasoning mix with allspice, nutmeg, and Scotch bonnet pepper might be just the ticket. The possibilities are endless, and the best part? You can tailor your spice blend to match the sides or sauces you plan to serve with your fried chicken.
Marination and seasoning are the heart and soul of great fried chicken. Up next, we’ll dive into the techniques that ensure the perfect golden crust every time.
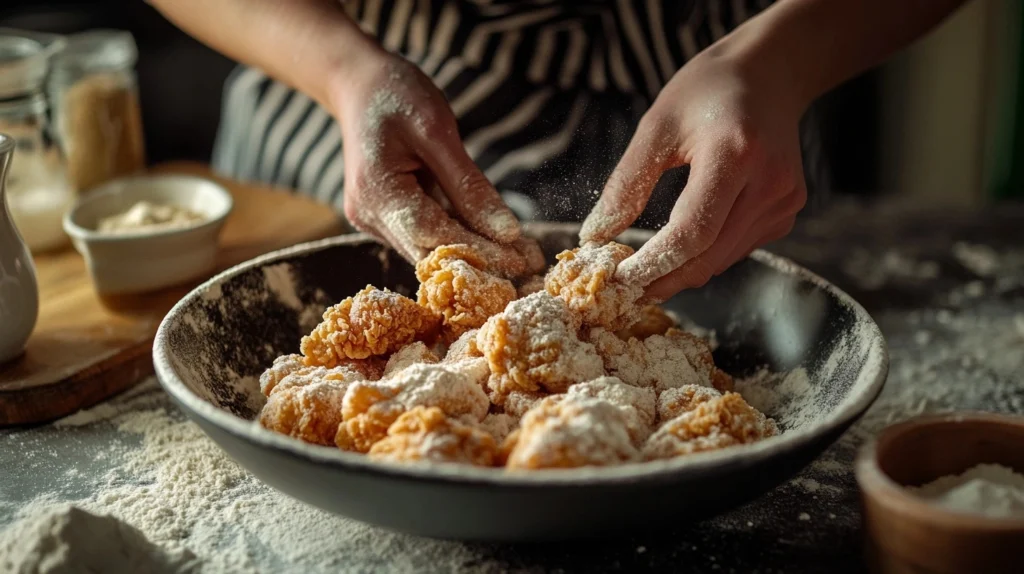
The Role of Dredging and Coating
A perfectly crispy fried chicken starts with the right dredging and coating technique. This step isn’t just about making the chicken look good—it’s about ensuring that every bite has that coveted crunch, locking in flavor and moisture while keeping the crust from falling apart. Let’s explore how to make your chicken irresistibly crunchy.
The Double-Dredging Method for Extra Crunch
Double-dredging is a technique that guarantees the thick, crispy crust we all love. It’s a simple process but one that makes a world of difference. Here’s how you can do it step by step:
- Step 1: Start with Marinated Chicken
Remove the chicken pieces from the buttermilk or salt brine marinade. Let the excess liquid drip off, but don’t pat the chicken dry—you want it moist enough to hold the coating. - Step 2: First Dredge
Dip each piece into a bowl of seasoned flour (or a flour-cornstarch mix). Ensure the chicken is evenly coated, then shake off the excess flour. - Step 3: Dip in Liquid
Dunk the chicken into a shallow bowl of buttermilk, egg wash, or a mix of water and hot sauce, depending on your preference. - Step 4: Second Dredge
Press the chicken into the flour mixture again, ensuring it’s fully coated. For extra crunch, gently press the coating onto the chicken so it adheres well. - Step 5: Rest Before Frying
Place the coated chicken on a wire rack and let it sit for about 10 minutes. This step allows the coating to adhere better and prevents it from falling off during frying.
The result? A thick, golden crust that’s crispy on the outside and tender on the inside.
Flour vs. Cornstarch: Which Gives Better Crispiness?
The debate between flour and cornstarch for fried chicken coating is a heated one. Both have their strengths, but the choice depends on the texture you’re aiming for:
| Ingredient | Texture | Best For |
|---|---|---|
| Flour | Slightly thicker, softer crust | Traditional Southern-style fried chicken |
| Cornstarch | Lighter, extra crispy, crackly texture | Extra crispy chicken with an airy finish |
| Mix (50/50) | Balanced crispiness and tenderness | Achieving the best of both worlds |
Cornstarch crisps up faster than flour due to its higher starch content, while flour adds body and a traditional look to the crust. For the ultimate fried chicken, many cooks swear by a mix of half flour and half cornstarch to achieve a balanced, golden crust.
Using Breadcrumbs or Panko for a Crunchy Twist
If you’re in the mood for experimentation, try using breadcrumbs or panko as part of your coating. Breadcrumbs create a denser, more rustic crust, while panko—a Japanese-style breadcrumb—produces an airy, flaky crunch.
For breadcrumbs, you can season them with your favorite spices to match your chicken’s flavor profile. With panko, consider mixing it with grated parmesan or crushed cornflakes for an extra kick. Both options are excellent if you’re making oven-fried chicken, but they also hold up well in traditional frying.
Choosing the Right Oil for Frying
The type of oil you use can make or break your fried chicken. It affects not just the flavor but also the texture and even the overall success of your cooking process.
Why Oil Quality Matters
When frying chicken, the oil you use should have a high smoke point to withstand the high heat without burning. Here are some of the best oils for frying:
| Oil | Smoke Point | Flavor Profile |
|---|---|---|
| Peanut Oil | 450°F (232°C) | Neutral, slightly nutty |
| Canola Oil | 400°F (204°C) | Neutral |
| Vegetable Oil | 400°F (204°C) | Neutral |
| Avocado Oil | 520°F (271°C) | Neutral, mild |
Peanut oil is often preferred for its neutral flavor and high heat resistance, but canola and vegetable oils are excellent budget-friendly options.
How to Maintain Oil Temperature
Keeping your oil between 325°F and 375°F is essential for perfectly fried chicken. If the oil is too hot, the crust will burn before the chicken cooks through. If it’s too cool, the chicken absorbs too much oil, leaving it greasy.
Here are some tips for maintaining the perfect frying temperature:
- Use a thermometer to monitor the oil temperature constantly.
- Fry in small batches to avoid overcrowding, which can cool the oil.
- Allow the oil to return to its target temperature before adding the next batch of chicken.
Reusing Oil: Dos and Don’ts
Reusing frying oil can save money, but it’s important to do it safely. Here’s how:
- After frying, let the oil cool completely, then strain it through a fine mesh or cheesecloth to remove food particles.
- Store the oil in an airtight container in a cool, dark place.
- Avoid reusing oil more than 2-3 times, as it degrades with each use and can affect the flavor of your food.
Frying Techniques and Temperature Control
Mastering the right frying technique is critical for great fried chicken. Your choice of equipment and attention to temperature control can take your cooking from “meh” to amazing.
Deep Fryer vs. Cast Iron Skillet
Both deep fryers and cast iron skillets have their advantages.
| Method | Pros | Cons |
|---|---|---|
| Deep Fryer | Maintains consistent oil temperature | Takes up counter space |
| Cast Iron Skillet | Even heat distribution, more accessible | Requires more manual temperature control |
A deep fryer is convenient and keeps the temperature steady, but a cast iron skillet offers a classic cooking experience and is more versatile for home cooks.
The Role of Thermometers in Perfect Frying
Thermometers aren’t optional—they’re essential. An oil thermometer ensures your frying temperature stays in the sweet spot, while a meat thermometer lets you check that your chicken reaches an internal temperature of 165°F without cutting into it and losing juices.
For oil, clip a thermometer to the side of your pot or skillet. For the chicken, insert the meat thermometer into the thickest part of the meat, avoiding the bone. This simple tool can make a world of difference, ensuring juicy meat every time.
Next up, we’ll discuss common mistakes people make when frying chicken and how to avoid them for perfect results every time.
Top Mistakes People Make When Frying Chicken
Frying chicken may seem simple, but it’s one of those tasks where small missteps can lead to big disappointments. Whether it’s soggy skin, undercooked meat, or unevenly fried crust, many of the common mistakes made during the process can be easily avoided with a little knowledge and care. Here’s a rundown of the biggest blunders people make when frying chicken—and how to steer clear of them.
Frying at the Wrong Temperature
The temperature of your oil is the foundation of good fried chicken. If your oil is too hot, the crust will brown—or worse, burn—before the meat is cooked through. On the flip side, if the oil is too cool, your chicken will soak up too much oil, leaving it greasy, heavy, and unappetizing.
How to Get It Right:
Keep your oil between 325°F and 375°F throughout the frying process. Use a reliable thermometer to monitor the temperature consistently. Remember to let the oil reheat between batches because adding cold chicken to the oil can cause the temperature to drop. Maintaining the right temperature ensures that the chicken cooks evenly, leaving you with a perfectly golden crust and juicy interior.
Overcrowding the Pan or Fryer
When you’re in a hurry to get all the chicken cooked, it’s tempting to throw as many pieces as you can into the pan or fryer. Unfortunately, this is one of the easiest ways to ruin your chicken. Overcrowding reduces the oil’s temperature, leading to uneven cooking and greasy chicken. It also prevents the crust from becoming crisp, as the moisture released by the chicken pieces creates steam.
How to Get It Right:
Fry in small batches, ensuring the pieces have enough space to float freely in the oil without touching. A good rule of thumb is to fry 3–4 pieces at a time, depending on the size of your pot or skillet. This will keep the oil temperature steady and allow the chicken to cook evenly.
Not Resting the Chicken After Frying
Imagine this: you’ve just pulled a batch of golden, crispy chicken from the fryer, and you’re eager to dig in. But cutting into it immediately is a rookie mistake that can ruin all your hard work. Skipping the resting step doesn’t give the crust time to “set,” which means it can turn soggy, fall off the chicken, or fail to lock in the meat’s juices.
How to Get It Right:
After frying, place the chicken on a wire rack (not paper towels!) to let the excess oil drain. Let it rest for 5–10 minutes before serving. This allows the crust to crisp up fully while the juices redistribute within the meat, giving you a crunchier and juicier end result.
Skipping the Marination Step
Marination isn’t just an optional step—it’s what separates ordinary fried chicken from extraordinary fried chicken. Skipping the marinade means you’re missing out on a chance to infuse the chicken with flavor and tenderness. Without it, the meat may end up bland or dry, no matter how perfectly the crust turns out.
How to Get It Right:
Always marinate your chicken for at least 4 hours, though overnight is ideal. A buttermilk or salt brine adds flavor and moisture, making the chicken tender on the inside while the crust stays crispy on the outside. Don’t rush this step—it’s the foundation of delicious fried chicken.
By avoiding these common mistakes, you’ll be well on your way to frying up chicken that’s crispy, juicy, and full of flavor. Up next, we’ll discuss the best ways to serve and enjoy your perfectly fried chicken!
For extra crunch, double-dredging your chicken in seasoned flour and cornstarch is key. Want to learn more tricks for achieving the crispiest chicken possible? Check out What is the Trick to Getting Crispy Chicken? A Step-by-Step Guide for Perfect Crunch.
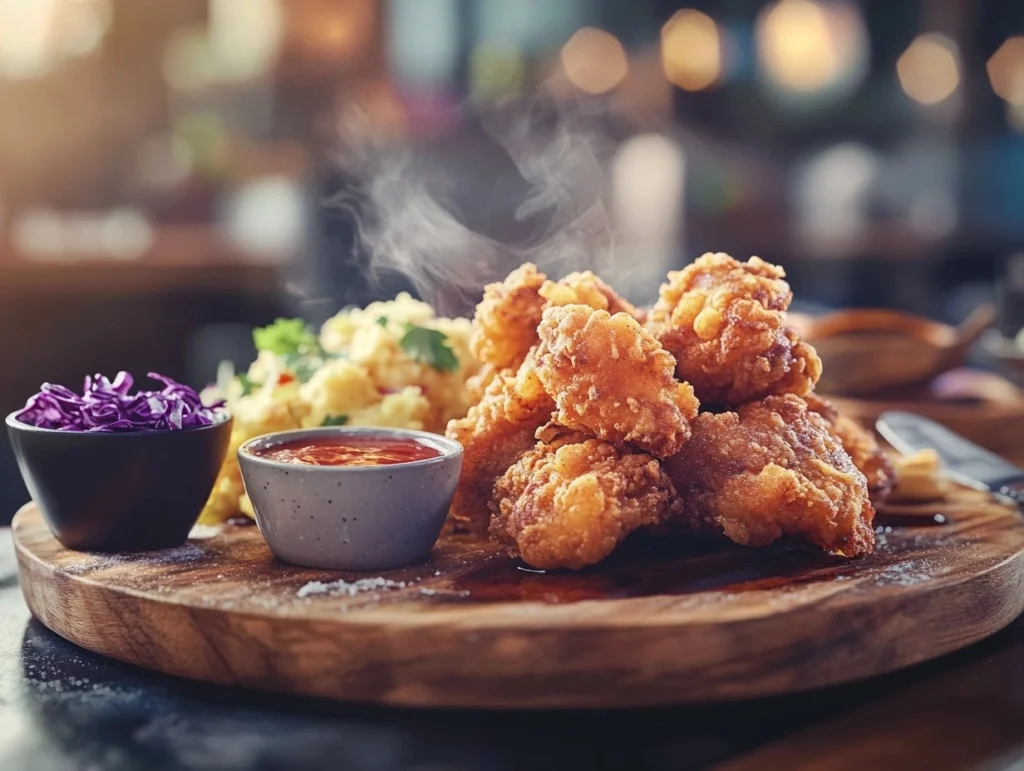
How to Serve Fried Chicken for Maximum Flavor
When it comes to fried chicken, how you serve it is just as important as how you cook it. Pairing your perfectly fried chicken with the right sides and accompaniments can turn a simple meal into an unforgettable dining experience. And let’s not forget—keeping those leftovers tasty and crispy is equally important.
Perfect Side Dishes for Fried Chicken
Fried chicken shines brightest when served with comforting, classic sides. Fluffy mashed potatoes with a rich gravy, crunchy coleslaw with a tangy kick, and warm, buttery biscuits are timeless favorites that balance the rich flavors of fried chicken. For a touch of sweetness, add cornbread or honey-glazed carrots to the table. Prefer something lighter? A fresh green salad or steamed veggies can add a refreshing contrast to the hearty chicken.
Storing Leftovers Without Losing Crispiness
Leftover fried chicken can easily go soggy if not stored properly. To maintain its crispy crust, avoid refrigerating the chicken in an airtight container immediately. Instead, let it cool completely, then store it in a paper towel-lined container to absorb excess moisture. When reheating, skip the microwave—use an oven at 350°F for about 15 minutes to restore that crunchy exterior.
Dipping Sauces to Pair with Fried Chicken
Nothing complements fried chicken better than a delicious dipping sauce. Popular options include creamy honey mustard, tangy ranch dressing, and spicy Korean gochujang. For a sweeter touch, try a honey barbecue sauce or even classic hot sauce. Mixing and matching sauces can make every bite a little different and keep things exciting.
Frequently Asked Questions About Fried Chicken
Fried chicken is a universally loved dish, but mastering it can leave home cooks with plenty of questions. From frying techniques to ingredient choices, let’s tackle some of the most common inquiries to help you cook up crispy, delicious chicken every time.
How to pan-fry chicken sausage?
Pan-frying chicken sausage is simple and quick. Start by heating a non-stick skillet over medium heat and adding a small amount of oil to prevent sticking. Place the sausages in the skillet and cook them for about 10–12 minutes, turning occasionally to ensure they brown evenly. To confirm they’re fully cooked, check that the internal temperature reaches 165°F with a meat thermometer. For added flavor, you can deglaze the pan with a splash of chicken broth or water toward the end of cooking.
How long to pan-fry boneless chicken thighs?
Boneless chicken thighs take around 12–15 minutes to pan-fry, depending on their thickness. Start by seasoning the thighs and heating a skillet with oil over medium-high heat. Cook the thighs for 6–7 minutes on each side, flipping only once to ensure a beautiful golden crust. Use a meat thermometer to check that the internal temperature reaches 165°F before serving.
Why soak chicken in milk before frying?
Soaking chicken in milk (or buttermilk) before frying helps tenderize the meat and improve its flavor. The lactic acid in milk gently breaks down proteins, creating a tender texture without making the chicken mushy. Buttermilk, in particular, adds a slight tang that complements the seasoning. It also helps the flour coating stick better, resulting in a crispier crust.
Is it better to pan-fry chicken in butter or oil? Does butter or oil make chicken crispier?
Oil is the better option for frying chicken if crispiness is your goal. Butter adds rich flavor but has a low smoke point, meaning it can burn quickly and leave a bitter taste. High smoke-point oils like peanut, canola, or vegetable oil are ideal for frying as they cook the chicken evenly and crisp up the crust without burning. That said, you can add a small pat of butter toward the end of frying for a flavor boost without compromising crispiness.
Check out Does Butter or Oil Make Chicken Crispier? The Ultimate Guide to Perfect Crispy Chicken for a full comparison.
What is the trick to getting crispy chicken?
The secret to crispy chicken lies in three key steps: proper coating, oil temperature, and resting. Double-dredging your chicken in a seasoned flour or cornstarch mix ensures a thick, crunchy crust. Maintain the oil temperature between 325°F and 375°F for even cooking. Finally, let the fried chicken rest on a wire rack for 5–10 minutes after frying. This allows the crust to set and any excess oil to drain, leaving it irresistibly crisp.
For extra crunch, double-dredging your chicken in seasoned flour and cornstarch is key. Want to learn more tricks for achieving the crispiest chicken possible? Check out What is the Trick to Getting Crispy Chicken? A Step-by-Step Guide for Perfect Crunch.
What not to do when frying chicken?
Avoid these common mistakes to ensure fried chicken success:
- Don’t overcrowd the pan, as it lowers the oil temperature and leads to soggy chicken.
- Never skip marination—it’s essential for juicy, flavorful meat.
- Don’t use cold chicken straight from the fridge; let it sit at room temperature for 30 minutes before frying to ensure even cooking.
- Avoid frying in oil that’s too hot or too cold, as it can either burn the crust or make the chicken greasy.
- Don’t place fried chicken on paper towels; instead, use a wire rack to maintain crispiness.
For a complete list of mistakes to avoid, check out What Not to Do When Frying Chicken: Avoid These Common Mistakes.
By keeping these tips and tricks in mind, you’ll be frying up chicken like a pro in no time. Whether you’re pan-frying sausages, achieving crispy perfection, or choosing the right fat for cooking, these FAQs have you covered!
The Secret to Perfect Fried Chicken Revealed
What is the secret to good fried chicken? It isn’t about luck—it’s about getting a few essential steps just right. From marinating the chicken to infuse it with flavor and moisture, to seasoning every layer for bold, mouthwatering taste, each step plays a critical role. Using the right coating method, like double-dredging with flour and cornstarch, is another part of the secret to achieving that crispy, golden crust we all crave. And, of course, frying at the correct temperature (between 325°F and 375°F) ensures your chicken is evenly cooked, perfectly crisp, and never greasy.
Here’s the truth: what is the secret to good fried chicken? It’s consistency. Temperature control and patience are your best friends in the frying process. Don’t rush the oil, avoid overcrowding the pan, and be sure to let the chicken rest after frying. These thoughtful steps are what truly take your fried chicken from ordinary to something special.
But here’s the best part: what is the secret to good fried chicken lies in its versatility. Fried chicken is endlessly customizable, allowing you to stick with classic Southern spices or try bold international flavors. Whether you’re using paprika and cayenne for heat or experimenting with Korean gochugaru, the possibilities are as endless as your creativity.
So, what’s holding you back? Gather your ingredients, roll up your sleeves, and start frying! What is the secret to good fried chicken? With a little practice, a pinch of patience, and a whole lot of love, you’ll be serving up crispy, juicy, flavorful chicken that makes you wonder why you ever settled for takeout.
What is the secret to good fried chicken? It’s no longer a mystery—it’s in your hands. Ready to give it a try?