Cherry sauce is an irresistible topping that brings a vibrant burst of flavor to any cheesecake. Whether you’re using fresh, frozen, or canned cherries, crafting your own homemade cherry sauce is simple and rewarding. This article will guide you step-by-step, from selecting the perfect cherries to adding creative variations, ensuring your cheesecake is crowned with the perfect finishing touch. Let’s dive into the details of making cherry sauce for cheesecake!
If you’re craving a delicious dessert, why not try making cherry cheesecake? For a complete, easy-to-follow recipe, check out our article The Ultimate Cherry Cheesecake Recipe: Step-by-Step Guide.
What is Cherry Sauce?
Cherry sauce is a sweet, tangy topping made primarily from cherries, sugar, and a thickening agent. This velvety sauce can complement a variety of desserts, but it truly shines when paired with cheesecake. By balancing sweetness and acidity, it enhances the creamy richness of the cheesecake.
Importance of Cherry Sauce in Cheesecake
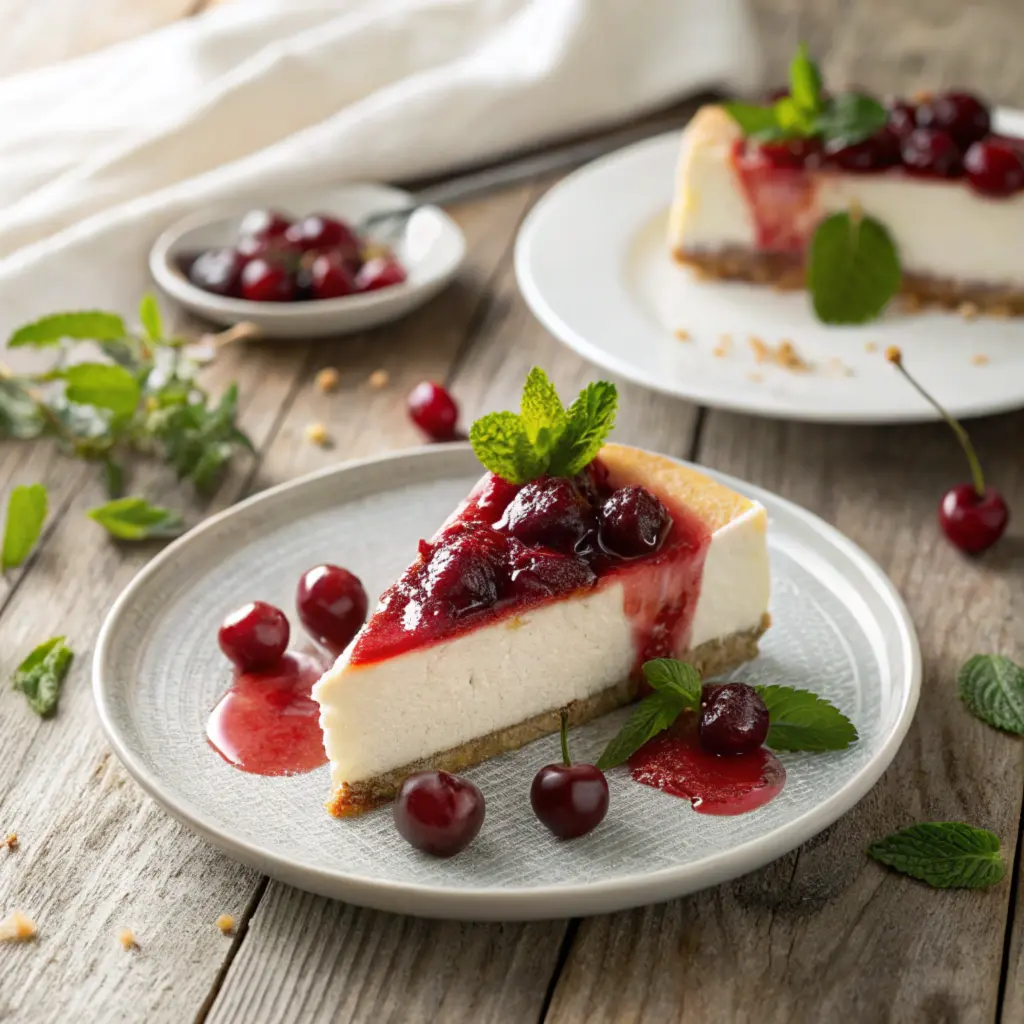
A cheesecake on its own is luscious and creamy, but adding a cherry topping elevates its appeal. The sauce creates a contrast of textures and flavors—smooth cheesecake meets luscious cherries—making each bite a delightful experience. Plus, the vibrant red color adds visual appeal, perfect for making desserts look as good as they taste.
Selecting the Right Cherries
Picking the right cherries is the cornerstone of a delicious cherry sauce. Whether you’re aiming for a tart burst of flavor or a naturally sweet sauce, the type of cherry you choose can make all the difference. Let’s break it down further.
Fresh vs. Frozen Cherries
Fresh cherries are ideal when they’re in season—juicy, full of flavor, and perfect for homemade sauces. But frozen cherries? Oh, they’re a lifesaver when fresh ones aren’t available. They’re picked at peak ripeness and often just as flavorful. Plus, frozen cherries are pre-pitted, saving you time and effort. So, if you can’t get fresh cherries, don’t hesitate to go frozen.
Sweet vs. Tart Cherries
Sweet cherries, like Bing or Rainier, bring a natural sugary flavor to the sauce, which means less added sugar. On the other hand, tart cherries, like Montmorency, give the sauce a tangy kick that complements rich desserts like cheesecake. Not sure which one to use? You can even mix both for a balanced flavor profile!
Additional Ingredients Needed
Aside from cherries, a few simple ingredients come together to create the perfect cherry sauce. Here’s what you’ll need.
Sweeteners
Sugar is the go-to for cherry sauce. White sugar provides a neutral sweetness, while brown sugar adds a subtle caramelized flavor. Want a natural option? Honey or maple syrup works too! If you’re curious about the health benefits and drawbacks of various sweeteners, check out this Healthline guide on sugar and alternatives.
Thickeners
Cornstarch is the most common thickener, giving the sauce a glossy finish. Arrowroot powder is a great alternative for a similar texture. Some people even use flour, but it can make the sauce slightly cloudy.
Flavor Enhancers
A splash of lemon juice brightens the sauce, cutting through the sweetness and balancing flavors. A touch of vanilla extract or almond extract can also add depth, making the sauce even more irresistible.
Suggested Table
| Ingredient | Purpose | Possible Alternatives |
|---|---|---|
| Cherries | Main flavor component | Fresh, frozen, or canned cherries |
| Sugar | Sweetener | Honey, maple syrup, brown sugar |
| Cornstarch | Thickener | Arrowroot powder, flour |
| Lemon juice | Balances sweetness, adds acidity | Lime juice |
| Vanilla extract | Enhances flavor | Almond extract |
Essential Kitchen Tools
Creating the perfect cherry sauce isn’t just about the ingredients; having the right tools makes the process smooth and enjoyable. These essentials will help you prepare, cook, and store your sauce with ease.
Saucepan Selection
The saucepan is the heart of your cherry sauce preparation. Opt for a medium-sized, heavy-bottomed saucepan to distribute heat evenly and prevent scorching. Non-stick pans can be a great choice for easy cleanup, but stainless steel works just as well if stirred consistently.
Stirring Utensils
A good-quality wooden spoon or silicone spatula is your best friend here. They allow you to mix the sauce without damaging the saucepan’s surface. Silicone spatulas, in particular, are heat-resistant and flexible, making them ideal for scraping every last bit of sauce.
Measuring Instruments
Accuracy is crucial in achieving the perfect balance of flavors. Measuring cups for liquids, dry ingredients, and a set of measuring spoons ensure you get the ratios right. Digital kitchen scales are also handy for weighing cherries or sugar if precision matters to you.
Preparing the Cherries
Before you start cooking, proper preparation of the cherries ensures your sauce will have the perfect texture and flavor. Whether using fresh or frozen cherries, this step sets the foundation.
Washing and Pitting
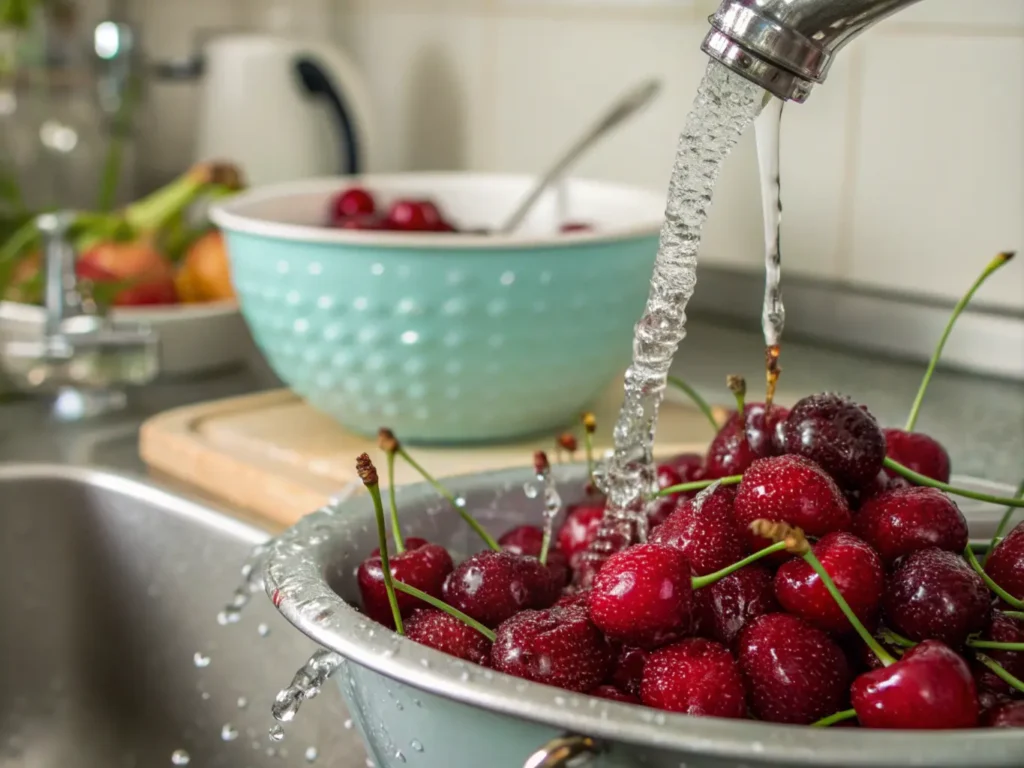
If you’re using fresh cherries, thoroughly wash them under cold water to remove any dirt or residue. Once clean, pit the cherries using a cherry pitter for convenience, or a sturdy straw or chopstick if you don’t have one. Removing pits is essential for a smooth sauce and ensures no unpleasant surprises when eating.

Chopping Techniques
Chopping the cherries into halves or smaller pieces allows them to break down more easily while cooking. For a chunkier sauce, leave some cherries whole; for a smoother consistency, dice them finely. Frozen cherries often come pre-pitted and can go straight into the saucepan if you’re short on time.
Cooking the Sauce
This is where the magic happens! Cooking transforms your prepared cherries into a luscious sauce that’s perfect for topping cheesecakes or other desserts.
Combining Ingredients
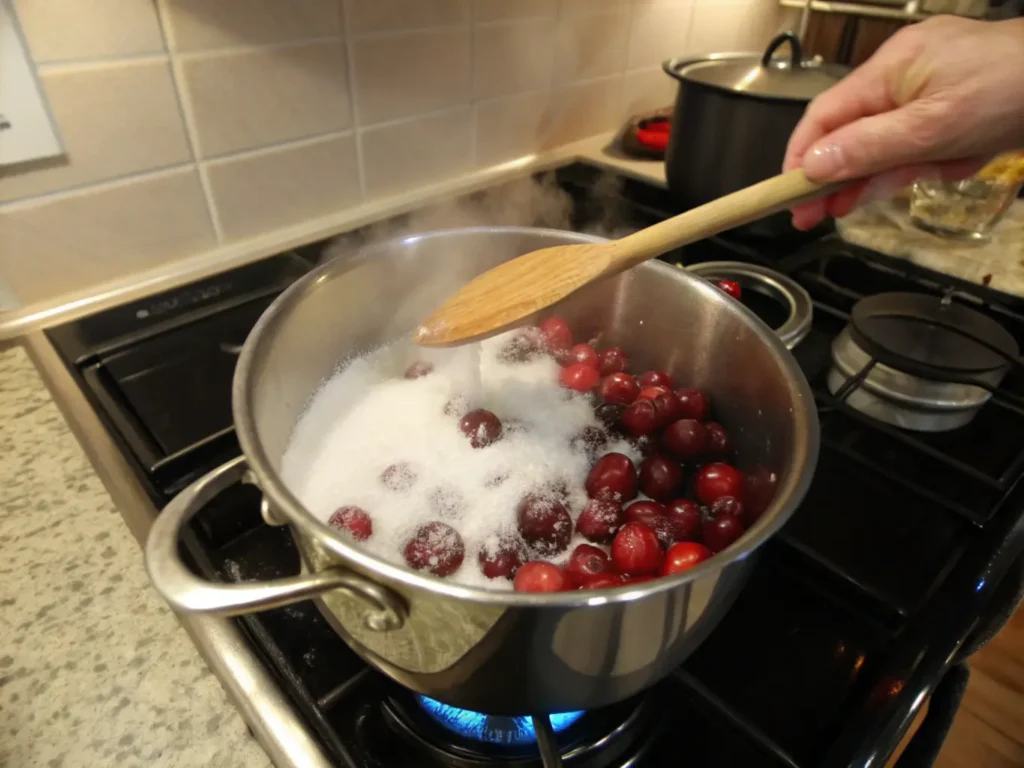
Start by placing the cherries, sugar, and a splash of lemon juice into your saucepan. Stir gently to coat the cherries evenly. Heat the mixture over medium heat until the cherries begin to release their juices, creating a syrupy base.

Achieving the Desired Consistency
To thicken the sauce, mix cornstarch (or an alternative thickener) with a little water to form a slurry, then stir it into the simmering cherries. Cook the mixture until it thickens to your liking, stirring frequently to avoid clumps. Lower the heat if needed to maintain a gentle simmer, ensuring the sauce doesn’t burn.
Cooling and Storing the Sauce
Once cooked, proper cooling and storage ensure your cherry sauce remains fresh and delicious.
Proper Cooling Methods
Allow the sauce to cool in the saucepan for 10–15 minutes before transferring it to a heat-safe container. For faster cooling, spread it out on a shallow tray and refrigerate until it reaches room temperature.
Storage Tips
Store your cooled cherry sauce in an airtight container in the refrigerator for up to one week. If you want to extend its shelf life, transfer the sauce to a freezer-safe container, leaving room for expansion, and freeze for up to three months. Thaw overnight in the refrigerator when ready to use.
Adding Other Fruits
Why stop at cherries when you can experiment with other fruits? Adding complementary fruits not only enhances the flavor profile but also creates a visually stunning sauce.
For a berry-packed twist, toss in raspberries, blueberries, or strawberries alongside your cherries. These fruits soften quickly and add a delightful sweetness and tang. Alternatively, apricots or peaches bring a subtle richness, while pineapple chunks add a tropical zing. Adjust cooking times slightly to ensure all fruits are evenly cooked.
Combining fruits doesn’t just taste great—it also lets you customize your sauce to match the season or your cheesecake’s flavor.
Incorporating Spices and Herbs
Spices and herbs can transform a simple cherry sauce into something extraordinary. A pinch of cinnamon or nutmeg adds warmth, making it perfect for autumn or holiday-themed desserts.
For a touch of sophistication, try fresh herbs like mint or basil. Chop finely and stir them in during the last few minutes of cooking. Another idea? Add a piece of ginger while the sauce simmers for a gentle, spicy kick. Just remove it before serving to keep the texture smooth.
Adjusting Sweetness Levels
Taste preferences vary, and adjusting the sweetness of your cherry sauce is incredibly simple. If your sauce feels too tart, add a tablespoon of sugar, honey, or maple syrup at a time, tasting as you go.
To reduce sweetness, add a splash of lemon juice or even a small pinch of salt to balance flavors. Using tart cherries? Start with less sugar and increase gradually. For sweeter varieties, you might need little to no sugar at all.
These tweaks ensure your cherry sauce perfectly suits your cheesecake and personal preferences.
Pairing with Different Cheesecake Flavors
Cherry sauce pairs wonderfully with traditional cheesecakes, but why not branch out to other flavors? Its sweet-tart profile complements a variety of cheesecake types, creating harmonious or contrasting combinations.
For a classic New York-style cheesecake, cherry sauce adds a pop of brightness to its creamy, dense base. If you’re working with chocolate cheesecake, the sauce provides a fruity contrast that enhances the richness. Lemon cheesecake and cherry sauce? That’s a match made in heaven—the citrusy tang balances the cherry’s sweetness beautifully.
Experiment further with flavored cheesecakes. A vanilla bean cheesecake is a blank canvas that lets the cherries shine, while an almond-flavored base pairs perfectly with a touch of almond extract in the sauce. Whichever cheesecake you choose, cherry sauce makes it unforgettable.

Using Cherry Sauce in Other Desserts
Although it’s a classic cheesecake topping, cherry sauce is versatile enough for a wide range of desserts. Drizzle it over vanilla ice cream for a quick treat, or layer it into a trifle for a show-stopping centerpiece.
Fancy something simpler? Use cherry sauce as a filling for crepes, or swirl it into plain yogurt for a refreshing snack. For bakers, it makes an excellent filling for pastries like turnovers or danishes. Even waffles and pancakes take on new life with a generous helping of cherry sauce.
Its uses go far beyond cheesecake, proving that a good cherry sauce is a must-have in every kitchen.
Frequently Asked Questions
How long does homemade cherry sauce last?
Homemade cherry sauce can last up to one week when stored in an airtight container in the refrigerator. Be sure to cool the sauce completely before sealing it to prevent condensation. If you want to store it for longer, freezing is a great option. Properly stored in a freezer-safe container, it can last up to three months.
Can I freeze cherry sauce?
Yes, cherry sauce freezes beautifully! Once cooled, transfer it to a freezer-safe container, leaving a bit of space for expansion. When ready to use, thaw it overnight in the refrigerator and give it a quick stir before serving. Freezing is perfect for making large batches in advance.
How to make cherry cheesecake?
To make cherry cheesecake, start with a graham cracker crust, followed by a rich cream cheese filling. Bake the cheesecake until set, then top it with homemade cherry sauce for a vibrant finish. For a no-bake version, let the cheesecake chill in the refrigerator before adding the sauce.
For detailed instructions and step-by-step guidance, check out our article How to Make Cherry Cheesecake: A Step-by-Step Recipe Guide.
What are the three types of cheesecake?
The three main types of cheesecake are New York-style, which is dense and creamy; no-bake cheesecake, which is lighter and chilled rather than baked; and ricotta cheesecake, popular in Italian cuisine and featuring a slightly grainy texture.
To learn more about these varieties, check out our article What Are the Three Types of Cheesecake? A Comprehensive Guide.
What’s the difference between New York cheesecake and regular cheesecake?
New York cheesecake uses extra cream cheese and sometimes heavy cream, resulting in a dense and ultra-rich texture. Regular cheesecake often has a lighter texture, sometimes using sour cream or ricotta in the filling for a different flavor and consistency.
How to make a cherry topping for cheesecake?
To make a cherry topping for cheesecake, cook cherries, sugar, and lemon juice over medium heat until the cherries release their juices. Thicken the mixture with cornstarch slurry, and simmer until glossy and smooth. Cool before spreading it over your cheesecake.
What is no-bake cheesecake filling made of?
No-bake cheesecake filling typically consists of cream cheese, powdered sugar, vanilla extract, and whipped cream or condensed milk for a light, creamy texture. The filling is chilled until firm, eliminating the need for baking.
For a full breakdown of ingredients and tips, visit our article What Is No-Bake Cheesecake Filling Made Of? A Complete Guide.
Can I freeze cherry cheesecake?
Yes, cherry cheesecake can be frozen! Wrap the cheesecake tightly in plastic wrap and aluminum foil to prevent freezer burn. Freeze for up to three months. For the best results, add the cherry topping fresh after thawing to maintain its texture.
How to make cherry cheesecake no bake?
To make a no-bake cherry cheesecake, combine a graham cracker crust with a whipped cream cheese filling. Chill the cheesecake until firm, then top it with a cooled cherry sauce. It’s a quick and easy dessert with no oven required!
Summarizing the Cherry Sauce Making Process
Making cherry sauce for cheesecake is a simple yet rewarding process that elevates any dessert. It starts with selecting the best cherries—fresh or frozen, sweet or tart—and prepping them by washing, pitting, and chopping. Cooking the cherries with sugar and a thickener like cornstarch creates a glossy, flavorful sauce, which can then be cooled and stored for later use.
From experimenting with variations like added fruits or spices to serving it with different cheesecake flavors or desserts, cherry sauce proves its versatility. With these steps, you can confidently craft a homemade topping that’s both delicious and visually stunning. Whether you’re serving it fresh or saving it for another day, this cherry sauce is bound to impress!

