

There’s nothing worse than slicing into a homemade pie, only to find that the bottom crust is soggy instead of crispy. If you’ve ever wondered how to get a crispy crust on the bottom of a pie, you’re not alone. A golden, flaky base is what makes a pie truly satisfying, but achieving that perfect texture requires the right techniques.
Moist fillings, improper baking methods, and the wrong type of bakeware can all lead to a disappointing crust. The good news? There are tried-and-true methods that bakers swear by to keep the bottom crisp. From blind baking and docking the dough to choosing the right pie pan, every step in the process matters. For a simple and flavorful approach to making mini chicken pot pies, don’t miss this detailed recipe on mini chicken pot pies, which offers step-by-step instructions and tips.
In this guide, we’ll break down the exact methods to keep your crust from turning into a soggy mess. Let’s get started!
The Science Behind a Crispy Pie Crust: Best Way to Crisp Pie Bottom
If you have ever wondered, how do you get a crispy crust on the bottom of a pie, the answer lies in a perfect balance of fat, gluten, moisture, and heat. These elements work together to create the ideal texture. If one of them is off, the crust may turn tough, crumbly, or worst of all, soggy. Understanding these factors is the best way to crisp the pie bottom and avoid a disappointing, soft base.
Role of Fat in Dough Formation: How Do You Get a Crispy Crust on the Bottom of a Pie?
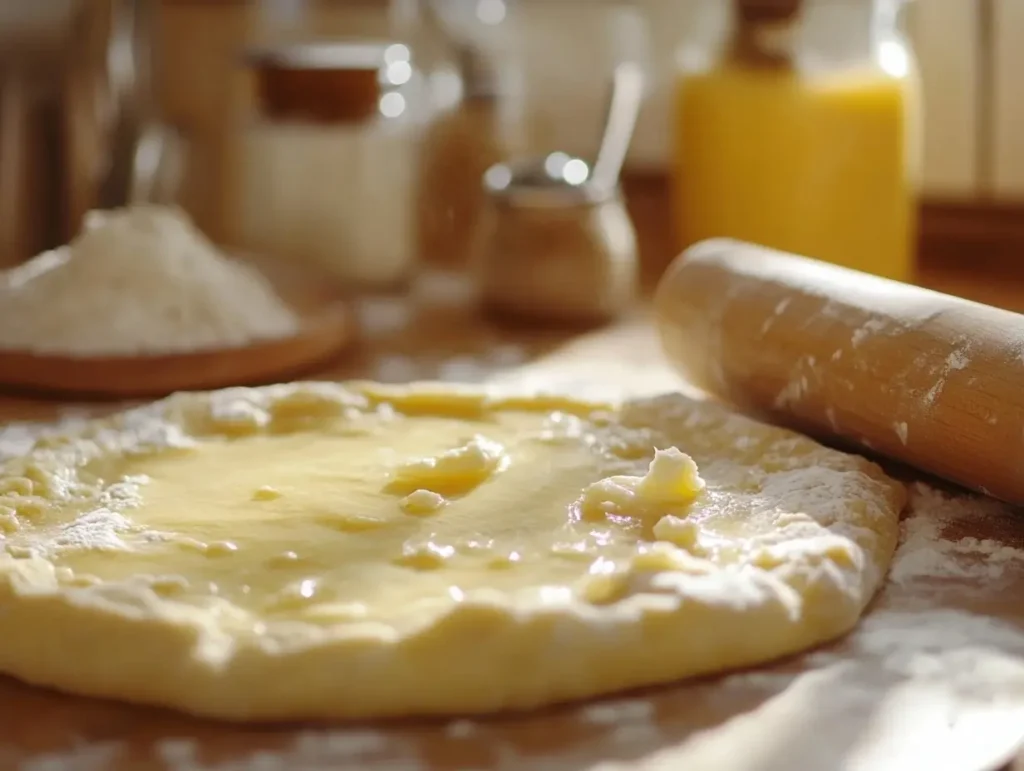
Fat plays a crucial role in determining whether your crust will be flaky and crispy or dense and chewy. Butter, shortening, or lard coats the flour particles, preventing excessive gluten development. The trick? Keep the fat cold.
When the dough hits the oven, the fat melts, leaving behind pockets of air that create delicate, crispy layers. Using a combination of fats—such as butter for flavor and shortening for structure—is one of the best techniques for a crunchy pie base. If you’ve been struggling with soggy results, adjusting your fat ratio might be the answer to how do you get a crispy crust on the bottom of a pie.
Importance of Gluten Development: How to Prevent Soggy Pie Crust
Gluten provides structure, but too much of it leads to a tough crust, while too little causes crumbling. Mixing the dough just enough is essential—overworking it will make the crust tough, while under-mixing won’t give it enough strength to hold the filling.
A well-balanced dough is a key pie crust baking tip because it allows for flakiness without compromising crispiness. A good rule of thumb? Handle the dough as little as possible while ensuring all ingredients are fully incorporated. That way, how do you get a crispy crust on the bottom of a pie won’t be a mystery anymore.
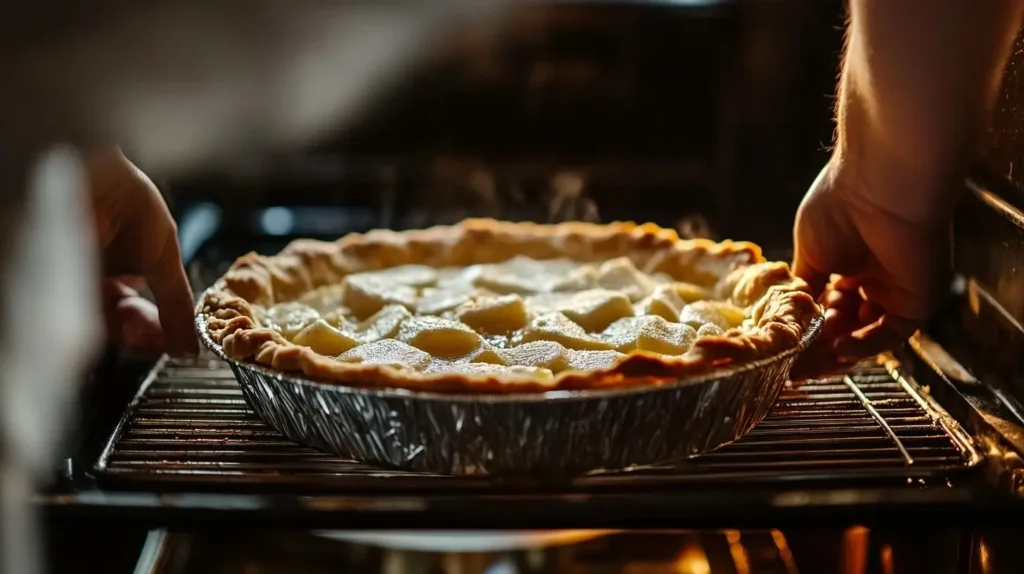
Impact of Baking Temperature on Crust Texture: How Do You Get a Crispy Crust on the Bottom of a Pie Every Time?
Baking temperature directly affects how crisp the crust turns out. A low temperature means the crust absorbs moisture before firming up, leading to sogginess. A properly preheated oven (375-425°F) helps set the crust quickly, ensuring the best way to crisp the pie bottom before the filling releases too much liquid.
For an even crispier base, baking on a preheated metal sheet or pizza stone helps transfer heat efficiently to the bottom crust, preventing it from staying soft. If you’ve been searching for how do you get a crispy crust on the bottom of a pie, the right baking temperature and surface are crucial factors to consider.
By understanding these fundamental baking principles, you’ll know how to prevent soggy pie crust and achieve a beautifully golden, crunchy bottom layer every time. If your crust hasn’t been turning out as crisp as you’d like, adjusting these factors might be the best way to crisp the pie bottom successfully.
Common Causes of a Soggy Bottom Crust: How to Prevent Soggy Pie Crust
A soft, underbaked bottom crust is a common issue for bakers. If you’re wondering how to prevent a soggy pie crust, the problem usually comes down to excess moisture, incorrect baking times, or improper dough thickness. Below are the most common mistakes and the best solutions to achieve a crisp, golden-brown base.
Excess Moisture from Fillings: Best Way to Crisp Pie Bottom
One of the biggest reasons for a soggy crust is a filling that releases too much liquid. This often happens with fruit pies, where juices seep into the dough instead of allowing it to crisp up.
Fix it:
- Pre-cook fruit fillings to evaporate excess moisture before adding them to the crust.
- Use thickening agents like cornstarch, tapioca, or flour to absorb juices.
- Let fruit fillings cool slightly before pouring them into the crust to avoid trapping extra steam.
This simple step is one of the best pie crust baking tips for avoiding a wet, undercooked base.
Inadequate Baking Time or Temperature: Techniques for a Crunchy Pie Base
If you remove your pie from the oven too soon, the bottom crust may still be soft and doughy. Some pies—like apple, pumpkin, and pecan—require longer bake times to allow moisture to fully evaporate.
Fix it:
- Use a glass or metal pie pan so you can check the bottom before taking it out of the oven.
- Bake until the bottom crust looks golden brown rather than pale.
- Start at a higher temperature (around 425°F) for the first 15 minutes, then lower it to ensure even baking.
Proper baking time and temperature control are key techniques for a crunchy pie base.
Improper Dough Thickness: Pie Crust Baking Tips
A crust that is too thick may stay doughy in the center, while one that is too thin can burn before the rest of the pie is fully baked.
Fix it:
- Roll the dough evenly to about ⅛ inch thick—thin enough to crisp up but sturdy enough to hold the filling.
- Avoid overworking the dough, as too much handling can make it tough instead of flaky.
By following these pie crust baking tips, you can avoid common mistakes and get the crisp bottom crust that every great pie deserves.
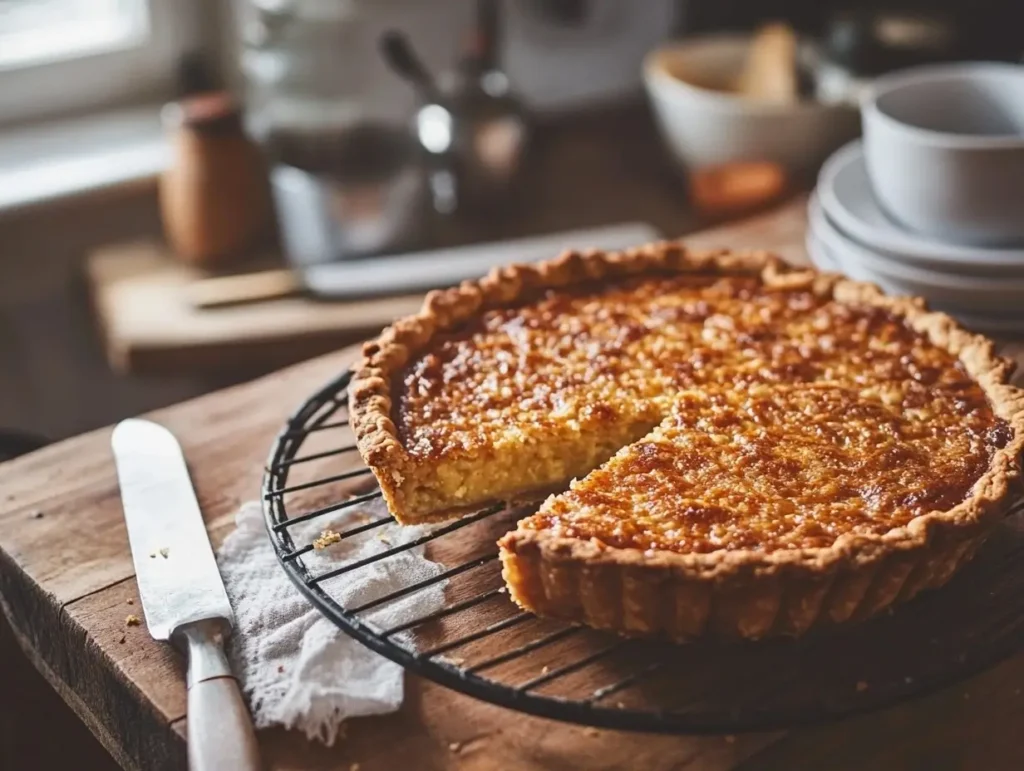
Blind Baking the Crust
Blind baking is one of the most effective ways to prevent a soggy bottom crust. It allows the dough to set and crisp up before the filling is added, reducing the chances of excess moisture soaking in.
What is Blind Baking?
Blind baking is the process of baking a pie crust before adding the filling. It is commonly used for pies with wet fillings, such as custards, fruit pies, and no-bake fillings. By pre-baking the crust, you create a barrier that prevents the filling from turning the bottom layer soft.
Some recipes call for a partial blind bake (where the crust is only lightly baked before filling), while others require a fully blind-baked crust (completely baked before filling is added).
Step-by-Step Guide to Blind Baking
- Preheat the Oven – Set the oven to 375°F–425°F for the best results.
- Roll Out the Dough – Carefully roll out your dough and fit it into the pie dish, making sure it is evenly spread with no air pockets.
- Dock the Dough (Optional) – Prick the bottom of the crust with a fork to prevent air bubbles from forming.
- Line with Parchment Paper – Place a sheet of parchment paper or aluminum foil over the dough, pressing it gently into the corners.
- Add Pie Weights – Fill the lined crust with pie weights, dried beans, or rice to keep it from puffing up.
- Bake for 10-15 Minutes – The crust should start to firm up, and the edges should be slightly golden.
- Remove the Weights and Lining – Carefully take out the parchment paper and weights to allow the bottom crust to cook fully.
- Bake Again (if needed) – If a fully baked crust is required, return it to the oven for another 5-10 minutes until it turns golden brown.
Choosing and Using Pie Weights
Pie weights help keep the crust flat and prevent shrinking during blind baking. Without them, the dough can bubble up or collapse inward.
Best options:
- Ceramic pie weights – Hold and distribute heat evenly.
- Metal pie weights – Conduct heat quickly, leading to a crispier base.
- Dried beans, rice, or sugar – A budget-friendly alternative, though they do not conduct heat as well as ceramic or metal.
Once cooled, store pie weights in an airtight container for future use.
Utilizing Pie Weights Effectively
Using pie weights correctly ensures a crisp and evenly baked crust.
Types of Pie Weights: Ceramic vs. Metal vs. Homemade
Each type of pie weight has its advantages:
- Ceramic weights – Distribute weight evenly and provide steady heat retention.
- Metal weights – Heat up quickly, helping to crisp the bottom crust.
- Homemade alternatives (beans, rice, sugar) – Affordable and reusable but may not weigh down the crust as effectively as commercial options.
A lesser-known trick is using granulated sugar as a pie weight. It distributes heat evenly and can be reused in baking afterward.
Proper Placement and Quantity of Weights
To get the best results, pie weights need to be used in the right way:
- Fill the crust completely – Spread weights across the entire base, ensuring even coverage.
- Press against the edges – This prevents the crust from shrinking away from the pie dish.
- Use enough weight – A generous amount prevents the bottom from puffing up.
Removing Weights Without Damaging the Crust
Once the initial bake is done, removing the weights carefully is crucial:
- Allow the crust to cool slightly before attempting to remove the weights.
- Gently lift the parchment paper or foil, ensuring it does not tear the crust.
- If needed, press down any slight puffing with the back of a spoon while the crust is still warm.
With the right blind baking technique and proper use of pie weights, your pie crust will come out crisp, firm, and ready to hold any filling without becoming soggy. In the next section, we will cover another essential step—docking the dough.
Docking the Dough
Docking is a simple yet effective method that helps prevent air pockets and uneven baking, ensuring a crispier bottom crust.
Purpose of Docking
Docking involves poking small holes in the pie dough before baking. These tiny perforations allow steam to escape, preventing the crust from puffing up and creating unwanted air pockets. When steam gets trapped, it can lead to uneven baking, making some areas crisp while others remain soft.
This technique is especially useful when blind baking, as it helps the crust maintain its shape. However, it is not recommended for pies with very wet fillings, as the holes can allow liquid to seep through, leading to a soggy bottom.
How to Dock Properly
- Use a fork or docking tool – Press lightly to create evenly spaced holes across the bottom of the crust.
- Avoid over-docking – Too many holes can weaken the structure, while too few may not allow enough steam to escape.
- Dock before adding pie weights – If blind baking, dock the dough first, then line it with parchment paper and add weights.
Docking is a small step, but it makes a big difference in achieving a crisp, well-structured crust.
Applying an Egg Wash or Barrier Layer
A barrier layer helps prevent moisture from softening the crust by creating a protective seal between the dough and the filling.
Benefits of an Egg Wash
Brushing an egg wash onto the crust before baking does more than add a golden sheen—it helps lock in crispiness. The protein in eggs forms a protective layer that repels liquid, reducing the risk of the filling soaking into the crust.
Using an egg wash also enhances browning, giving the pie an appealing golden color. The choice of wash (whole egg, egg yolk, or egg white) affects the final look and texture:
- Whole egg – Provides color and slight shine.
- Egg yolk with milk or cream – Creates a deep golden hue with a glossy finish.
- Egg white only – Strengthens the crust without adding much color.
Alternative Barrier Layers: Chocolate, Jam, etc.
For pies where an egg wash may not be ideal, other ingredients can act as a moisture barrier:
- Melted chocolate – Great for custard and fruit pies, forming a firm, waterproof layer.
- Jam or fruit preserves – Adds a hint of sweetness while sealing the crust.
- Butter or shortening – A thin coating of melted fat can help repel liquid.
- Cornstarch slurry – Creates a starchy film that absorbs excess moisture.
Application Techniques
- Apply after blind baking – If using an egg wash, brush it on during the last few minutes of baking to avoid a raw texture.
- Use a pastry brush – This ensures even coverage without soaking the crust.
- Let it dry before filling – Allowing the barrier to set ensures it effectively protects against moisture.
A well-sealed crust stays crisp longer, giving each bite the perfect texture. In the next section, we’ll cover how choosing the right pie dish can also influence the bottom crust’s crispiness.
Choosing the Right Pie Dish
The type of pie dish you use can make or break your crust’s texture. Some materials absorb heat slowly, while others conduct it quickly, affecting how evenly the crust bakes.
Glass vs. Metal vs. Ceramic Pans
- Glass pie dishes – Best for monitoring the crust as it bakes. Glass heats up more slowly but retains heat well, allowing the bottom to crisp up evenly.
- Metal pie pans – Conduct heat quickly, leading to a faster and crispier crust. However, they can sometimes cook too fast, resulting in an overbrowned bottom.
- Ceramic pie dishes – Hold heat well, making them ideal for longer bakes, but they do not conduct heat as efficiently as metal. This can sometimes lead to a softer crust.
If you struggle with a soggy bottom crust, a metal pan with a dull finish is the best option since it absorbs and distributes heat efficiently.
Conductivity and Its Effect on Crust Crispiness
Heat conductivity determines how well the crust bakes. Pans with high conductivity, like aluminum and stainless steel, create a crispier bottom by transferring heat quickly. In contrast, thick ceramic or glass dishes require a longer bake time but provide steady, even heat.
To counteract low conductivity in glass or ceramic dishes, bake the pie on a preheated baking sheet or pizza stone to boost the heat underneath the crust.
Recommended Pie Dish Brands
For consistently crispy crusts, these brands offer some of the best pie dishes:
- USA Pan Bakeware Aluminized Steel Pie Pan – Excellent heat conduction for a perfectly crisp crust.
- Pyrex Glass Pie Plate – Great for monitoring doneness and even heat distribution.
- Emile Henry Ceramic Pie Dish – Retains heat well, ideal for long baking times.
Each dish type has its strengths, but the key is knowing how to adjust baking times and temperatures based on the material.
Oven Rack Placement and Temperature Settings: Best Way to Crisp Pie Bottom
Even if you use the right dough and follow all the proper techniques, a soggy bottom crust can still happen if your oven settings are incorrect. Proper rack placement and temperature control are essential for baking a pie with a crispy, golden-brown base.
Ideal Rack Position for Even Baking: How to Prevent Soggy Pie Crust
The lower third of the oven is the best place for baking pies. This position allows the bottom crust to receive direct heat first, helping it crisp up before the filling releases too much moisture.
Placing the pie in the center or top rack can lead to an undercooked bottom, as the top crust may finish baking before the base has time to firm up. If your pies often have a soft crust, adjusting the rack placement is an easy fix.
Preheating and Temperature Consistency: Techniques for a Crunchy Pie Base
A properly preheated oven ensures that the crust bakes at the right temperature from the start. If the oven is not hot enough, the filling may seep into the dough before the crust has a chance to crisp up.
For the best results, bake pies at the following temperatures:
- Fruit pies – 400°F–425°F to set the crust quickly and prevent sogginess.
- Custard pies – 350°F–375°F for slow, even baking without overcooking the filling.
- Double-crust pies – Start at 425°F for the first 15 minutes, then reduce to 375°F to allow even baking while crisping the bottom.
If the top crust browns too quickly before the bottom is done, place a piece of foil loosely over the pie to prevent over-browning while allowing the base to continue crisping.
Using Baking Stones or Steel for Enhanced Crispiness: Pie Crust Baking Tips
For an even crunchier pie base, bake the pie directly on a preheated baking stone or baking steel. These tools retain and transfer high heat, helping the bottom crust bake faster and preventing it from turning soggy.
- Baking stones – Made from ceramic or cordierite, they distribute heat evenly and reduce excess moisture.
- Baking steel – Conducts heat more efficiently than stone, creating an ultra-crispy bottom crust.
To use this method, place the baking stone or steel in the oven while preheating. Then, set the pie dish directly on top to ensure instant heat transfer to the bottom crust. This technique mimics the effect of professional baking ovens, making it one of the best ways to crisp a pie bottom.
By fine-tuning oven placement, temperature, and baking surface, you can avoid a soggy crust and achieve a perfectly crisp, bakery-quality pie every time.
Modifying Dough Ingredients: Best Way to Crisp Pie Bottom
The ingredients in your pie dough play a crucial role in determining how flaky and crisp the crust turns out. Small adjustments can make a big difference, helping you achieve a crust that stays firm and crunchy, even with moist fillings. Below are key pie crust baking tips that will help improve texture and structure.
Incorporating Vinegar or Vodka for Tenderness: How to Prevent Soggy Pie Crust
Adding a small amount of vinegar or vodka to the dough enhances tenderness and helps prevent gluten overdevelopment, which can lead to a tough crust.
- Vinegar – Slightly weakens gluten formation, keeping the dough more tender while also improving browning. A teaspoon of apple cider or white vinegar is enough.
- Vodka – Hydrates the dough without activating gluten, since alcohol evaporates quickly during baking. This creates a tender, flaky crust that still crisps up well.
Neither vinegar nor vodka affects the flavor, making them easy additions for achieving a crispier bottom crust.
Adjusting Fat Types and Ratios: Techniques for a Crunchy Pie Base
The type of fat used in the dough significantly impacts how crispy or flaky the crust turns out. Each fat option has its strengths:
- Butter – Provides rich flavor and creates well-defined flaky layers but has a lower melting point.
- Shortening – Produces a sturdier, more stable crust, helping prevent shrinkage but lacks the depth of flavor.
- Lard – Known for making ultra-crisp crusts, it holds up well against wet fillings while creating a light, airy texture.
For the best results, a mix of butter and shortening—typically 75% butter and 25% shortening—offers both structure and flavor. This combination helps prevent a soggy bottom while maintaining a flaky texture.
While butter adds rich flavor and flakiness, some bakers opt for shortening or lard due to their stability. Each fat has unique properties that affect both texture and health. For a deeper look into the benefits and drawbacks of different fats in baking, you can check out this resource on fats and nutrition.
Adding Cornmeal or Semolina for Texture: Pie Crust Baking Tips
For an extra layer of crispiness, incorporating cornmeal or semolina into the dough can provide better resistance against moisture.
- Cornmeal – Adds a slightly gritty texture, enhancing crunch. Mixing a tablespoon into the flour helps reinforce the bottom crust.
- Semolina flour – Absorbs excess moisture and strengthens the structure, preventing it from becoming soggy. Swapping out a small portion of all-purpose flour with semolina improves durability.
These small modifications help reinforce the crust’s ability to stay crisp, even when dealing with juicy or custard-based fillings. By fine-tuning your ingredients, you can apply the best way to crisp a pie bottom and achieve a bakery-quality result.
Pre-Cooking Fillings to Reduce Moisture
One of the biggest culprits of a soggy bottom crust is excess moisture from the filling. Pre-cooking certain fillings before assembling the pie minimizes the risk of the juices soaking into the dough.
Methods for Fruit Fillings
Fresh fruit releases a lot of liquid during baking, which can seep into the crust. To prevent this:
- Cook fruit fillings in a saucepan before adding them to the crust. Simmer until thickened with cornstarch or tapioca.
- Drain excess juice from cut fruit before adding sugar and spices.
- Mix in a small amount of flour or cornstarch to soak up extra liquid.
These steps help thicken the filling in advance, reducing the amount of moisture released during baking.
Techniques for Custard and Cream Fillings
Custard-based pies, like pumpkin or chocolate cream, contain a lot of liquid that can soften the crust if not handled correctly.
- Use a partially baked crust to prevent the filling from soaking in before the bottom sets.
- Allow hot fillings to cool slightly before pouring them into the crust to avoid excess steam absorption.
- Bake custard pies at a lower temperature (around 325°F–350°F) to avoid overcooking the filling while still crisping the bottom.
Balancing Juiciness and Moisture Control
It’s important to strike a balance—while you don’t want a dry filling, excessive moisture leads to a soggy crust.
- Use thickening agents like cornstarch, flour, or tapioca to absorb extra liquid.
- Brush the crust with an egg wash or melted chocolate to create a barrier before adding the filling.
- Let fruit pies cool completely before slicing to allow the juices to thicken naturally.
By making small adjustments to the dough and pre-cooking fillings when necessary, you’ll be well on your way to achieving a perfectly crisp bottom crust every time. Next, we’ll cover how to troubleshoot common issues bakers face when trying to keep their pie crust crispy.
Frequently Asked Questions
Many bakers struggle with keeping their pie crusts crisp, especially when making dishes like chicken pot pie, which has a rich, creamy filling. Below are answers to some of the most common questions about preventing a soggy bottom and baking mini pot pies to perfection.
How do you keep the bottom crust of a chicken pot pie from getting soggy?
A creamy filling can easily soak into the bottom crust, turning it soft. To prevent this:
- Pre-bake the crust (blind bake) before adding the filling to create a firm base.
- Brush the bottom crust with an egg wash to create a moisture barrier.
- Use a metal or glass pie pan to conduct heat efficiently, helping the bottom bake evenly.
- Thicken the filling properly with cornstarch or flour to reduce excess liquid.
- Bake on the lower oven rack to direct heat toward the bottom crust first.
Struggling with a soggy bottom crust in your chicken pot pie? Learn proven methods to keep it perfectly crispy in this in-depth guide.
Should I prebake the bottom crust for chicken pot pie?
It depends on how thick the filling is. If your filling is very creamy, partially blind baking the bottom crust for 10-15 minutes before adding the filling can help prevent it from turning soggy. However, if your filling is thick enough to not seep into the crust, blind baking may not be necessary. For a detailed breakdown of the pros and cons, check out Should I Prebake the Bottom Crust for Chicken Pot Pie?.
How do you keep the bottom of a pot pie from getting soggy?
In addition to pre-baking the crust, these techniques help keep the bottom from becoming mushy:
- Increase oven temperature slightly to crisp the crust quickly before the filling can soak in.
- Avoid overly wet fillings—reduce excess liquid before assembling the pie.
- Let the pie cool slightly before slicing so the filling thickens and doesn’t immediately release moisture into the crust.
For more expert tips and techniques, check out How to Keep the Bottom of a Pot Pie from Getting Soggy.
Should I bake the bottom pie crust first?
For most pies with wet fillings (like fruit or custard pies), yes, baking the bottom crust first is recommended to prevent sogginess. However, in double-crust pies or meat pies with a thick filling, the top and bottom crusts bake together, so blind baking may not always be needed. If you’re looking for a detailed breakdown of when and why to blind bake a pie crust, check out Should I Bake the Bottom Pie Crust First? The Ultimate Guide to Perfect Pies.
What to serve with mini chicken pot pies?
Mini chicken pot pies pair well with a variety of sides. Some great options include:
- Green salad with a light vinaigrette to balance the richness of the pie
- Roasted vegetables like carrots, Brussels sprouts, or asparagus
- Mashed potatoes for extra comfort-food appeal
- Steamed green beans or peas for a simple, classic side
- Cranberry sauce for a sweet and tangy contrast
How to make mini chicken pot pies?
Making mini pot pies follows a similar process to a full-size pie but requires smaller portions and shorter baking times.
- Preheat oven to 375°F.
- Roll out pie dough and cut into circles slightly larger than your muffin tin or ramekins.
- Prepare the filling by cooking diced chicken, vegetables, and a thickened sauce.
- Line muffin tins with the bottom crusts and spoon in the filling.
- Top with another layer of pie dough and crimp the edges. Cut small vents to let steam escape.
- Brush with egg wash for a golden, crisp finish.
- Bake for 20-25 minutes until the crust is golden brown.
How long to bake mini chicken pot pies?
Mini pot pies typically bake at 375°F for 20-25 minutes, or until the crust is golden brown and crispy. If using a pre-cooked filling, you only need to bake until the pastry is fully cooked. If the filling is raw, extend the baking time by a few minutes to ensure everything is cooked through.
By following these steps, you can enjoy perfectly crisp, golden-brown pot pies with a sturdy, flaky crust every time. Next, we’ll go over troubleshooting common pie crust issues and final baking tips.
Troubleshooting Common Issues: How Do You Get a Crispy Crust on the Bottom of a Pie
Even with the best techniques, pie crust problems can still happen. If you’re asking, how do you get a crispy crust on the bottom of a pie, but keep running into issues like shrinking, over-browning, or high-altitude complications, small adjustments can help. Below are solutions to the most common pie crust challenges.
Dealing with Shrinking Crusts: How Do You Get a Crispy Crust on the Bottom of a Pie Without It Pulling Away?
A shrinking crust pulls away from the edges of the pan, making it difficult to fill properly. This usually happens because of excess gluten development or improper handling.
How to prevent shrinking:
- Let the dough rest – After rolling it out, chill the dough for at least 30 minutes to relax the gluten.
- Don’t stretch the dough – When fitting it into the pan, gently press it in place instead of pulling it to fit. Stretching causes it to snap back as it bakes.
- Use the right pan – Glass or metal pans provide better grip than nonstick or ceramic pans, which allow the dough to slide down.
- Add a heavier weight – More pie weights help keep the crust in place during blind baking.
Preventing Over-Browning of the Crust: How Do You Get a Crispy Crust on the Bottom of a Pie Without Burning the Edges?
The edges of a pie crust brown much faster than the bottom, especially during longer bakes. If your pie crust keeps burning before the bottom crisps up, try these fixes.
Ways to prevent burning:
- Use a pie shield or foil – Cover the edges of the crust with aluminum foil or a pie shield halfway through baking to slow down browning.
- Lower the oven temperature – If the top crust is browning too quickly but the bottom isn’t done, reduce the temperature slightly and extend the baking time.
- Apply an egg wash carefully – Too much egg wash can cause uneven browning. Use a light, even coat.
Adjusting for High-Altitude Baking: How Do You Get a Crispy Crust on the Bottom of a Pie in High Elevations?
At high altitudes, lower air pressure affects how pies bake. Crusts may dry out faster, shrink more, or take longer to crisp up.
Tips for high-altitude pie baking:
- Increase liquid slightly – A little extra water in the dough prevents it from drying out too quickly.
- Reduce fat slightly – Too much fat can cause the crust to become greasy at high altitudes.
- Increase oven temperature by 15-25°F – This helps set the crust faster before it loses structure.
- Check for doneness early – Bake times can vary at high altitudes, so start checking a few minutes before the recipe suggests.
By making these small adjustments, you can answer the question how do you get a crispy crust on the bottom of a pie with confidence. Troubleshooting common pie crust problems will ensure a flaky, golden-brown base every time.