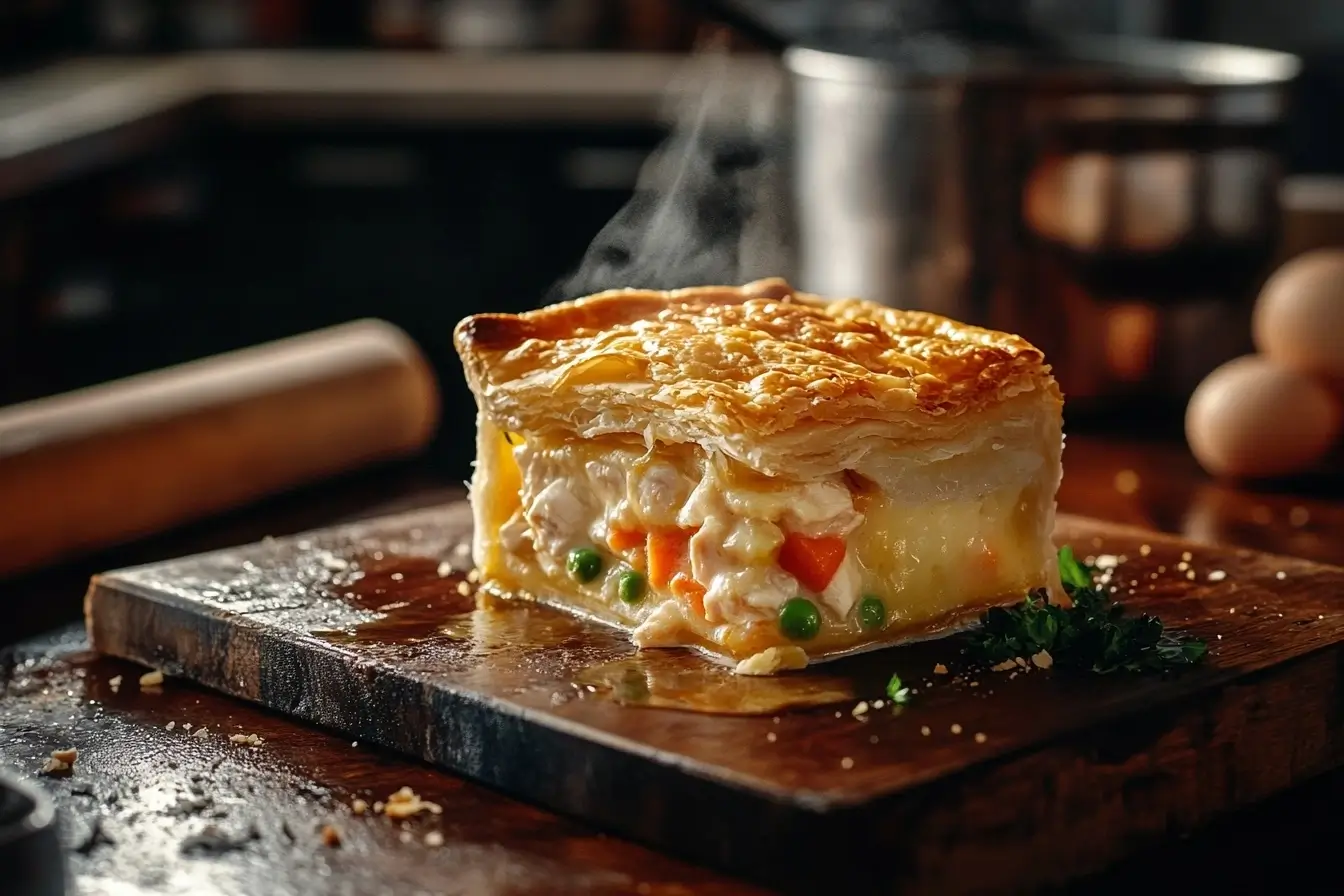
A soggy bottom crust can ruin an otherwise perfect pot pie. If you’ve ever wondered how do you keep bottom pot pie from getting soggy, the answer lies in proper preparation and baking techniques. Moisture from the filling, steam buildup, and even the type of pie dish you use all play a role in whether your crust turns out crisp or limp.
Luckily, there are plenty of ways to ensure a flaky, golden crust. From blind baking and using an egg wash to thickening the filling and preheating a baking sheet, small adjustments can make a huge difference. This guide covers everything you need to know about keeping your pot pie crust firm, crisp, and full of flavor. For a simple and flavorful approach to making mini chicken pot pies, don’t miss this detailed recipe on mini chicken pot pies, which offers step-by-step instructions and tips.
By the time you’re done reading, you’ll never have to deal with a soggy crust again. Let’s dive into the best strategies for baking the perfect pot pie.
Understanding the Causes of Soggy Bottoms in Pot Pies
Achieving a crisp, flaky crust starts with knowing why it gets soggy in the first place. If you want to prevent a soggy pot pie bottom, controlling moisture, heat distribution, and bakeware choice is essential. A wet, mushy crust usually results from excess liquid in the filling, improper oven settings, or selecting the wrong pie dish.
How Do You Keep Bottom Pot Pie from Getting Soggy? – Moisture Control in Fillings
The most common culprit behind a wet pie crust is an overly moist filling. When the mixture is too runny, the crust absorbs the liquid instead of baking into a firm, flaky layer.
Several factors contribute to a mushy bottom crust:
- High-water vegetables – Ingredients like mushrooms, zucchini, and frozen vegetables release moisture as they cook.
- Hot fillings – Pouring steaming hot filling onto the dough before baking can soften it instead of allowing it to crisp.
- Insufficient thickener – Without cornstarch, flour, or a roux, the filling remains too loose and seeps into the crust.
How to Avoid a Wet Pie Crust:
- Pre-cook vegetables to eliminate excess moisture before adding them to the filling.
- Allow the filling to cool slightly before pouring it into the crust to prevent steaming.
- Incorporate thickening agents such as cornstarch or flour to achieve a rich, creamy consistency.
Keeping the filling thick and balanced is one of the most effective ways to make pot pie crust firm and flaky.
How Oven Temperature Affects a Soggy Pot Pie Bottom – Keep It Crispy
Even with a properly prepared filling, baking at the wrong temperature can still lead to a soft bottom crust. A pot pie needs the right balance of heat and time to ensure even cooking.
Common Mistakes That Cause a Soggy Pot Pie Bottom:
- Low oven temperature – If the oven isn’t hot enough, the crust won’t crisp before the filling soaks in.
- Uneven baking – When the top crust browns too quickly while the bottom remains undercooked, heat distribution is inconsistent.
- Inconsistent timing – Removing the pie from the oven too soon leaves the bottom crust soft instead of golden and crispy.
How to Keep Pot Pie Crust from Getting Soggy:
- Bake at 375°F–425°F to ensure the bottom crisps up properly.
- Preheat a baking sheet and place the pie dish on top to transfer heat directly to the bottom crust.
- Check for doneness by lifting the pie slightly—if the bottom appears pale, extend the baking time.
Managing oven heat and timing effectively stops pot pie crust from getting mushy, delivering a beautifully browned, crispy base.
Pie Dish Material and Its Impact – Prevent a Soggy Pot Pie Bottom
The type of baking dish used significantly affects whether the bottom crust turns out crisp or soft. Materials conduct heat differently, influencing how well the crust bakes.
| Pie Dish Type | Pros | Cons |
|---|---|---|
| Glass | Provides even baking, allows easy monitoring of crust color | Heats up slowly, which may lead to a softer crust |
| Metal | Heats quickly, crisps the bottom effectively | Can brown too fast if oven temperature isn’t monitored |
| Ceramic | Retains heat well, ideal for slow baking | Can cause uneven crust crisping |
How to Avoid a Wet Pot Pie Bottom with the Right Bakeware:
- Opt for a metal pie pan to achieve a crispier bottom crust.
- Extend baking time slightly when using glass or ceramic dishes to ensure thorough cooking.
- Place the pie on a preheated baking stone or sheet for better heat distribution.
Selecting the right dish is a simple yet highly effective way to keep pot pie crispy and prevent a soft, soggy crust.vent a soggy bottom crust.
Techniques to Prevent a Soggy Bottom Crust
Blind Baking the Crust – Prevent Soggy Pot Pie Bottom
What is Blind Baking?
Blind baking is one of the most effective ways to stop pot pie crust from getting mushy. This technique involves pre-baking the bottom crust before adding the filling, allowing it to firm up and develop a crisp texture. By giving the dough a head start, you create a barrier that prevents liquid from seeping in too quickly.
Think of it as waterproofing your crust. Without this step, the moisture from the filling can soak into the dough before it has a chance to crisp, leading to a limp, unappetizing base. Many professional bakers rely on this technique for everything from fruit pies to quiches, and it works wonders for savory pot pies as well.
If you’ve ever wondered why bakery-style pies have a flaky, golden bottom crust, blind baking is often the reason. Fortunately, it’s an easy fix that requires only a few extra minutes but makes a huge difference.
Steps to Blind Bake a Crust
Blind baking is straightforward, but following the proper steps ensures the best results:
- Preheat your oven – Set it to 375°F–400°F for even baking.
- Roll out your pie dough – Place it in a metal or glass pie dish, pressing it gently against the bottom and sides.
- Dock the crust – Use a fork to poke small holes in the dough. This prevents air bubbles from forming.
- Chill the dough – Refrigerate the crust for at least 15–20 minutes to prevent shrinkage while baking.
- Line with parchment paper and add weights – Cover the dough with parchment paper and fill it with pie weights, dried beans, or rice to keep it from puffing up.
- Bake for 12–15 minutes – This firms up the crust without fully cooking it.
- Remove weights and continue baking – Take out the parchment and weights, then bake for another 5–7 minutes until lightly golden brown.
Once blind-baked, your crust will hold up beautifully under a rich filling without turning mushy.
Benefits of Blind Baking for Pot Pies
Why should you take the extra step of blind baking? Here are a few key benefits:
- Creates a crisp base – No more wet, limp crust.
- Prevents underbaking – The bottom crust gets a head start, so it bakes evenly with the rest of the pie.
- Enhances flavor – A lightly toasted crust adds a nutty depth that pairs perfectly with creamy fillings.
- Improves structure – Your pie slices will stay intact, rather than falling apart.
Blind baking might seem like an extra step, but the difference in texture and taste is worth it.
Using Egg Wash or Corn Syrup as a Barrier – Keep Pot Pie Crispy
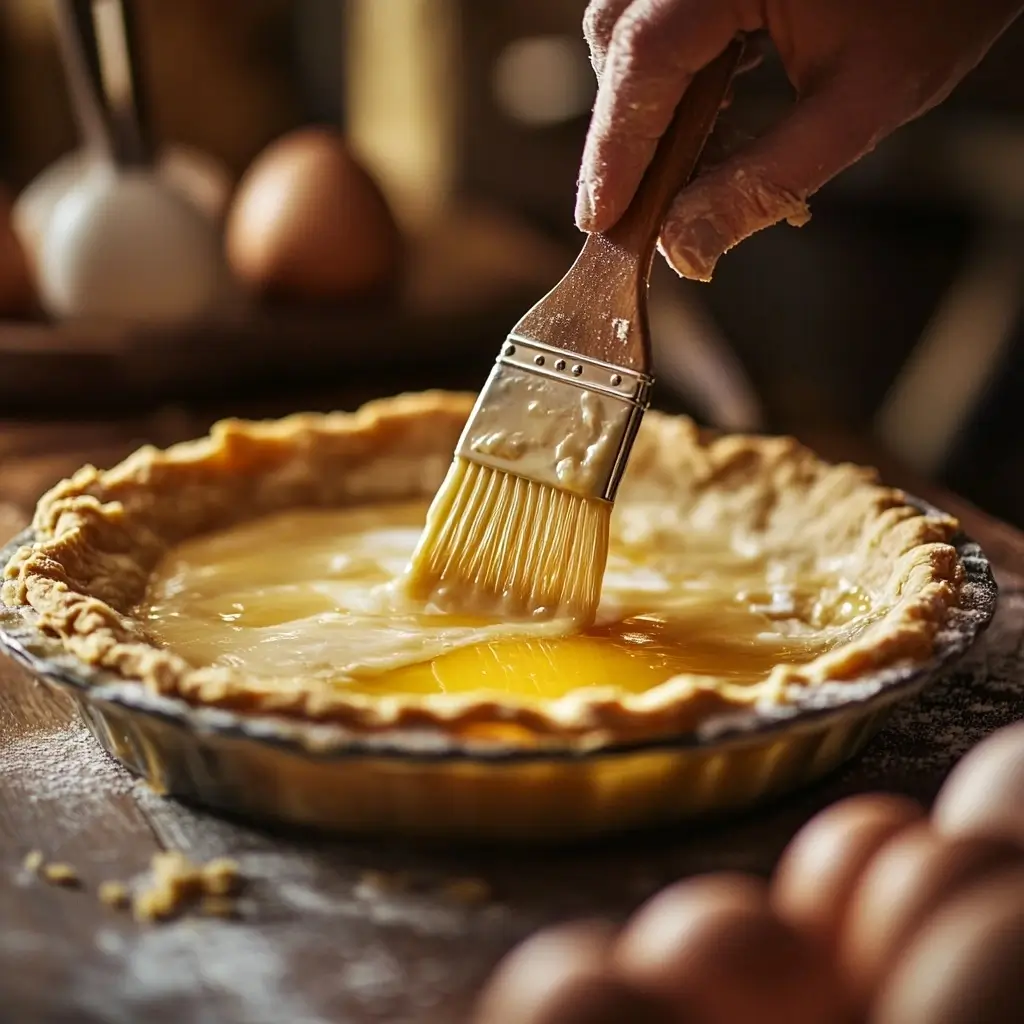
How Egg Wash Creates a Seal
Egg wash does more than give crust a beautiful golden sheen—it also acts as a moisture barrier, sealing the dough before the filling is added.
Here’s why it works:
- The proteins in the egg create a thin, glossy layer that hardens when baked.
- This layer repels moisture, keeping the crust crisp even after adding the filling.
- It enhances color, giving the crust a golden finish.
To apply egg wash, whisk one egg with a teaspoon of water or milk, then brush it over the bottom crust before baking. Once baked for a few minutes, the crust will develop a thin, protective layer that prevents it from soaking up excess liquid.
Applying Corn Syrup to the Crust
Corn syrup is another unexpected but effective way to avoid a wet crust. A thin coating of light corn syrup forms a sticky seal that locks out moisture.
To use corn syrup as a crust sealer:
- Blind bake the crust for about 10 minutes to firm it up.
- Lightly brush corn syrup onto the warm crust using a pastry brush.
- Let it set for a few minutes before adding the filling.
This technique works especially well for pot pies with extra creamy or rich fillings, as it prevents liquid from seeping in.
Comparing Egg Wash and Corn Syrup Methods
Which method is best? Here’s a comparison:
| Method | Best For | Pros | Cons |
|---|---|---|---|
| Egg Wash | Any pot pie crust | Seals well, adds color, protein-based | Can be slightly drying |
| Corn Syrup | Sweeter or richer pies | Locks out moisture, mild sweetness | Adds a slight stickiness |
For a neutral option, go with egg wash. If your filling contains a lot of moisture, corn syrup may provide better protection.
Incorporating “Crust Dust” – Make Pot Pie Crust Firm
Definition and Purpose of Crust Dust
Ever heard of crust dust? This bakery trick can help prevent soggy pot pie bottoms by absorbing extra moisture before it soaks into the dough.
Crust dust is a simple dry mixture of flour and sugar (or cornstarch) that’s lightly sprinkled onto the bottom crust before adding the filling. This creates a barrier, helping to keep the crust firm and flaky.
Many bakers use this technique for fruit pies, but it works just as well for savory pot pies.
How to Apply Crust Dust Effectively
Using crust dust is incredibly easy:
- Mix 1 tablespoon of flour with 1 tablespoon of cornstarch or sugar.
- Sprinkle a thin, even layer over the bottom crust before adding the filling.
- Lightly spread it with your fingers to ensure full coverage.
That’s it! As the pie bakes, the crust dust absorbs excess liquid, preventing it from soaking into the dough.
Advantages of Using Crust Dust in Pot Pies
Why should you try crust dust? Here’s what makes it so effective:
- Absorbs extra moisture – No more soggy crusts.
- Adds a subtle hint of flavor – Sugar adds a touch of sweetness, while flour keeps it neutral.
- Doesn’t alter texture – Since it blends with the filling, you won’t even notice it.
- Quick and foolproof – No fancy tools, just a simple sprinkle and bake.
When combined with blind baking and egg wash, crust dust becomes a powerful defense against a mushy bottom crust. If you’ve struggled with this issue before, this trick could be the game-changer you’ve been looking for.
By using these three techniques—blind baking, sealing the crust, and adding crust dust—you’ll be able to prevent soggy pot pie bottoms and enjoy a crispy, golden crust every time.his could be your secret weapon.
Selecting the Right Pie Dish
Metal vs. Glass vs. Ceramic Dishes
Heat Conductivity and Its Effects
The type of pie dish you use directly affects how well your crust bakes. Each material conducts heat differently, influencing whether your pot pie crust turns out crispy or soggy.
- Metal pie pans conduct heat quickly and efficiently, leading to a crispier bottom crust.
- Glass pie dishes heat up more slowly but distribute heat evenly, allowing you to monitor the browning process.
- Ceramic pie plates hold heat well but take longer to heat up, sometimes leading to uneven baking.
If your crust consistently turns out soft or undercooked, your baking dish might be the problem. Choosing the right material can be the difference between a perfectly golden crust and a disappointing, doughy bottom.
Pros and Cons of Each Material
Each type of pie dish has strengths and weaknesses when it comes to baking pot pies.
| Pie Dish Type | Pros | Cons |
|---|---|---|
| Metal (Aluminum or Stainless Steel) | Heats up fast, crisps crust well, lightweight | Can brown too quickly if oven temp isn’t controlled |
| Glass (Pyrex or Borosilicate) | Even heat distribution, easy to see crust color | Heats up slower, may require longer baking |
| Ceramic (Stoneware or Porcelain) | Retains heat well, maintains warmth after baking | Slow heat transfer, can lead to underbaked crusts |
Best Choice: If you struggle with soggy bottoms, metal pie dishes are your best bet. Their fast heat conduction ensures the bottom crust bakes before the filling has time to soak in.
Optimal Pie Dish Size and Depth
How Size Affects Baking
The size of your pie dish determines how evenly your pot pie bakes. Too small, and the filling might bubble over; too large, and the crust may dry out before the filling is fully cooked.
- Standard 9-inch pie pans are ideal for most pot pies, ensuring even cooking.
- Smaller than 8 inches may cause the filling to be too deep, leading to an underbaked center.
- Larger than 10 inches spreads the filling too thin, making the crust cook too fast.
Stick with a 9-inch dish for the best balance of filling distribution and crust texture.
Choosing the Appropriate Depth for Fillings
A pie dish that’s too deep can cause uneven cooking, while a shallow dish may result in an overcooked crust before the filling is fully heated.
- Deep-dish pie plates (2+ inches deep) work well for pies with extra filling but may require longer baking times to prevent a soggy bottom.
- Shallower dishes (1–1.5 inches deep) bake faster but might not hold enough filling for a hearty pot pie.
Best Choice: If your filling is thick and rich, opt for a standard-depth 1.5–2-inch dish to allow even heat distribution while preventing a wet bottom crust.
Managing Filling Consistency
Pre-Cooking Fillings to Reduce Moisture
Benefits of Pre-Cooking Ingredients
A wet filling is the number one cause of a soggy bottom crust. One of the best ways to reduce excess moisture is by pre-cooking ingredients before assembling the pie.
- Vegetables release water as they cook, especially mushrooms, onions, and bell peppers.
- Raw meat releases juices, which can seep into the crust if not pre-cooked.
- Frozen ingredients contain extra moisture, which melts into the filling while baking.
Pre-cooking ingredients helps evaporate excess liquid before they touch the pie crust, ensuring a thicker, less watery filling.
Techniques for Pre-Cooking Various Fillings
Different ingredients require different pre-cooking methods to prevent a watery pot pie.
Vegetables:
- Sautéing – Cook mushrooms, onions, or zucchini in a pan to release excess moisture before adding them to the pie.
- Roasting – Spread vegetables on a baking sheet and roast them at 375°F for 10–15 minutes to draw out water.
- Draining Frozen Veggies – Thaw completely and pat dry with a paper towel before use.
Meats:
- Brown ground meat before adding it to your filling to remove excess grease and moisture.
- Pre-cook chicken or turkey to avoid releasing juices into the crust while baking.
- Drain and blot with paper towels to soak up any extra liquid.
Taking a little extra time to pre-cook your filling ensures the crust stays firm and flaky!
Thickening Agents to Control Moisture
Common Thickening Agents Used in Pot Pies
Even with pre-cooked ingredients, pot pie filling needs a thick consistency to prevent it from seeping into the crust. Thickening agents help absorb excess liquid while keeping the filling smooth and creamy.
Here are some popular options:
| Thickening Agent | Best For | Notes |
|---|---|---|
| Flour | Traditional pot pie fillings | Must be cooked thoroughly to remove raw taste |
| Cornstarch | Clear, smooth texture | Works quickly, requires less than flour |
| Roux (flour + butter) | Rich, creamy fillings | Adds flavor and texture |
| Tapioca Starch | Gluten-free option | Works well for thicker fillings |
For classic pot pie fillings, a roux (butter + flour) is the best choice, giving the mixture a thick, velvety texture.
Using thickening agents like cornstarch, flour, or a roux helps absorb excess moisture and prevents a soggy crust. According to Healthline, cornstarch is particularly effective because it thickens quickly and creates a smooth, stable consistency without altering the flavor of the dish.
How to Properly Incorporate Thickening Agents
Adding thickening agents the right way is key to keeping your pot pie from getting watery.
✅ Flour or cornstarch slurry: Mix with cold water or broth before adding to the filling to prevent clumps.
✅ Cooking the roux: Whisk butter and flour together over medium heat for 1–2 minutes until golden before stirring into the filling.
✅ Simmering: Let the filling cook until it reaches a thick, creamy consistency before pouring it into the crust.
✅ Letting it cool: A hot, runny filling will steam up the crust—let it cool slightly before assembly.
By pre-cooking ingredients and using the right thickeners, you’ll get a rich, hearty filling without turning the crust into a soggy mess.
Baking Strategies for a Crisp Bottom Crust
Even if you’ve followed every trick so far—choosing the right dish, blind baking, and thickening the filling—your pot pie crust can still turn out soft if the baking process isn’t right. Oven temperature, rack placement, and preheating your bakeware all play a huge role in getting that golden, flaky bottom crust.
Preheating Baking Sheets or Pizza Stones
How Preheating Enhances Crust Crispiness
One of the best ways to prevent a soggy bottom crust is by placing your pie dish on a preheated baking sheet or pizza stone. This ensures that the bottom crust starts cooking immediately when it goes into the oven.
Here’s why it works:
- A cold pie dish takes time to heat up, allowing moisture from the filling to soak into the crust before it bakes.
- A preheated surface transfers heat directly to the bottom of the pie, crisping it faster.
- This method helps mimic the effect of a professional bakery oven, where heat comes from multiple directions.
If you’ve ever noticed that store-bought frozen pot pies tend to have firmer bottoms, it’s because they’re often baked directly on a hot oven rack or preheated pan!
Steps to Implement This Technique
Getting this technique right is simple but requires a little preparation:
- Place a baking sheet or pizza stone in the oven while it preheats to 425°F. Let it sit for at least 15 minutes.
- Assemble your pot pie while the oven and sheet heat up.
- Carefully place the pie dish on the preheated baking sheet or stone in the oven. Be cautious—it’s hot!
- Bake as usual, keeping an eye on the crust for even browning.
This simple trick dramatically improves crust crispiness, ensuring that the bottom bakes just as beautifully as the top.
Adjusting Oven Rack Placement
Ideal Rack Positions for Even Baking
Where you position your pot pie in the oven makes a huge difference in how the crust bakes. Most home bakers place pies in the middle rack, but for a perfectly crisp bottom crust, that’s not always ideal.
- Lower rack: Best for crisping up the bottom crust quickly while still allowing the filling to cook evenly.
- Middle rack: Works well for even heating but may not provide enough direct heat to the bottom.
- Upper rack: Not recommended, as it can cause the top crust to brown too fast before the rest of the pie is fully baked.
For pot pies, placing the dish on the lower third of the oven gives the best balance between a golden top and a fully cooked, crisp bottom crust.
Impact of Rack Placement on Crust Texture
The wrong oven rack position can lead to these common problems:
| Rack Position | Result |
|---|---|
| Too high | Top crust browns too quickly, bottom stays soft |
| Middle | Balanced but may not crisp the bottom enough |
| Lower third | Best for ensuring a crisp, golden bottom crust |
Pro Tip: If you want extra insurance against sogginess, combine preheating a baking sheet with lower rack placement. This way, your crust starts crisping immediately and continues baking with steady, even heat from below.
Additional Tips and Tricks
Even with the right techniques in place—choosing the best pie dish, preheating bakeware, and thickening the filling—certain small details can make or break your pot pie crust. Proper venting and crust thickness may seem minor, but they play a significant role in achieving that perfect, crispy base.
Venting the Pie Properly
Importance of Steam Release
As a pot pie bakes, steam builds up inside. Without a proper escape route, this trapped moisture can turn the crust soft instead of crisp. Allowing steam to vent is essential for maintaining texture.
A well-vented pie prevents the filling from boiling over, which helps the crust hold its structure. It also reduces humidity inside the dish, keeping the bottom crust from becoming overly soft. Additionally, proper venting allows the top crust to bake evenly, avoiding any doughy spots.
Without these steam-release points, your pie might look beautifully golden on the outside but remain wet and undercooked inside.
Methods to Vent a Pot Pie
Several easy venting techniques help steam escape while keeping your crust intact:
- Slits in the top crust – Use a sharp knife to create three to five small slits before baking. These allow steam to release gradually.
- Decorative cutouts – Small cookie cutters can form attractive vent holes that also serve a functional purpose.
- Lattice crust – Weaving strips of dough naturally provides open spaces for steam to escape while enhancing the pie’s presentation.
- Chimney vent – For deep-dish pot pies, insert a small rolled-up piece of foil or a ceramic pie bird in the center to act as a steam chimney.
Regardless of the method you choose, ensuring proper airflow prevents unwanted moisture from accumulating and softening the crust.
Balancing Crust Thickness
Ideal Thickness for Bottom and Top Crusts
A well-balanced pot pie crust needs the right thickness to achieve both crispness and structure. A bottom layer that’s too thin won’t provide enough support and may become soggy. On the other hand, a crust that’s too thick can turn out doughy instead of flaky.
For best results:
- Bottom crust – Aim for about 1/8 inch thick—sturdy enough to hold the filling while still crisping up.
- Top crust – Slightly thinner, around 1/16 inch, since it bakes faster.
When the crust is too thick, the filling may not cook evenly. If it’s too thin, it can tear or absorb too much moisture.
Techniques for Rolling Out Dough Evenly
Achieving a uniform crust thickness is key to ensuring even baking. Uneven dough can result in thin spots that burn quickly and thicker areas that remain undercooked.
- Use a rolling pin with thickness guides – Adjustable rolling pins help maintain a consistent thickness.
- Roll from the center outward – Instead of pressing down in one spot, apply even pressure in outward strokes.
- Rotate the dough as you roll – Turning the dough periodically prevents sticking and ensures even stretching.
- Chill before rolling – Letting the dough rest in the fridge for at least 30 minutes makes it easier to handle and prevents shrinking during baking.
By following these simple rolling techniques, you’ll get a crust that bakes evenly, turns out beautifully crisp, and holds its filling without breaking apart.
Frequently Asked Questions
Many home cooks struggle with getting the perfect pot pie crust. Below are some of the most common questions about how to keep bottom pot pie crust from getting soggy and how to bake a crispy, golden crust every time.
How do you keep the bottom crust of a chicken pot pie from getting soggy?
To prevent a soggy bottom crust, try these proven techniques:
- Blind bake the crust – Pre-baking the bottom crust for a few minutes before adding the filling helps it firm up.
- Use an egg wash – Brushing the bottom crust with an egg wash before filling creates a moisture barrier.
- Preheat a baking sheet – Placing the pie dish on a hot baking sheet helps the bottom cook faster.
- Thicken the filling – A runny filling seeps into the crust, so use flour, cornstarch, or a roux to keep it thick.
By combining these steps, your crust will stay crispy and golden, not soggy and limp. For expert tips on keeping the bottom crust of your chicken pot pie firm and flaky, visit this comprehensive guide on preventing sogginess.
Should I prebake the bottom crust for chicken pot pie?
Yes. Blind baking (prebaking) is one of the best ways to prevent a soggy crust. Here’s how:
- Roll out the dough and place it in the pie dish.
- Use a fork to poke holes in the bottom (docking).
- Line with parchment paper and add pie weights or dry beans.
- Bake at 375°F for 12–15 minutes, then remove the weights and bake for another 5–7 minutes.
- Let it cool slightly before adding the filling.
This extra step ensures a firm, golden crust that holds up under the filling. For a detailed breakdown of the pros and cons, check out Should I Prebake the Bottom Crust for Chicken Pot Pie?.
How do you get a crispy crust on the bottom of a pie?
For the crispiest bottom crust, follow these baking hacks:
- Use a metal pie pan – It heats up faster and crisps the bottom better than glass or ceramic.
- Bake on the lower oven rack – This ensures direct heat reaches the bottom crust.
- Preheat a baking sheet or pizza stone – Placing the pie on a hot surface helps cook the crust evenly.
- Use crust dust – Sprinkle a mix of flour and cornstarch on the bottom before adding the filling to absorb moisture.
- Let the pie rest after baking – Cutting it too soon releases steam, which can soften the crust.
These small tweaks make a huge difference in achieving that perfect flaky bite. For more expert tips and techniques, check out How Do You Get a Crispy Crust on the Bottom of a Pie?.
Should I bake the bottom pie crust first?
It depends on the type of pie. For pot pies, prebaking (blind baking) is recommended because the filling is thick and can release moisture.
However, for double-crust pies, some bakers skip prebaking and rely on a hot oven and thick filling to keep the bottom crisp.
To decide:
- Bake first if using a very wet filling, like creamy pot pie.
- No need to prebake if making a classic fruit pie with a well-thickened filling.
If you’re looking for a detailed breakdown of when and why to blind bake a pie crust, check out Should I Bake the Bottom Pie Crust First? The Ultimate Guide to Perfect Pies.
What to serve with mini chicken pot pies?
Mini chicken pot pies are hearty on their own, but pairing them with light, fresh sides balances out the richness. Here are some great options:
- Simple green salad – A fresh salad with a tangy vinaigrette cuts through the creamy filling.
- Roasted vegetables – Brussels sprouts, carrots, or green beans make a perfect complement.
- Mashed sweet potatoes – Adds a touch of sweetness to contrast the savory pie.
- Garlic bread or biscuits – Perfect for soaking up any leftover filling.
- Apple slaw – A crisp, slightly sweet slaw adds great texture.
These sides add variety without overpowering the flaky, buttery mini pies.
How to make mini chicken pot pies?
Mini chicken pot pies are easy to make and perfect for individual servings. Here’s a simple method:
- Preheat oven to 375°F.
- Roll out pie dough and cut circles slightly larger than muffin tin cups.
- Press dough into greased muffin tin cups.
- Fill each with thickened chicken pot pie filling (chicken, vegetables, roux).
- Cover with a smaller dough circle or a lattice top, crimp edges, and cut vents.
- Brush with egg wash for a golden finish.
- Bake for 25–30 minutes until golden brown.
- Let cool for 5 minutes before removing.
These bite-sized pies are perfect for dinner parties, meal prep, or snacking.
How long to bake mini chicken pot pies?
Mini chicken pot pies bake faster than full-size pies. Bake at 375°F for 25–30 minutes, or until:
- The crust is golden brown.
- The filling is bubbly.
- A knife inserted in the center comes out hot.
If using store-bought dough, follow the package instructions for best results. For extra crispiness, bake on a preheated baking sheet.
Conclusion
Recap of Key Strategies to Prevent Soggy Bottoms
Achieving a crispy, golden bottom crust in a pot pie is all about controlling moisture and heat. A soggy crust can ruin the texture of an otherwise perfect pie, but with the right techniques, you can ensure a flaky, well-baked base every time.
The most effective strategies include:
- Blind baking the crust to give it a head start before adding the filling.
- Using an egg wash or corn syrup to create a moisture barrier.
- Thickening the filling to prevent excess liquid from soaking into the crust.
- Choosing the right pie dish, with metal being the best for crisping.
- Preheating a baking sheet or pizza stone to help the bottom bake faster.
- Adjusting oven rack placement to ensure even cooking.
By combining these methods, you can eliminate soggy crust issues and enjoy a perfectly textured pot pie.
Encouragement to Experiment with Techniques
Not all ovens, ingredients, or baking dishes behave the same way, so trial and error is key to mastering the art of a flaky pot pie crust. What works best for one recipe may need slight adjustments for another.
Try different techniques to see what works best for your kitchen setup:
- Test different pie dish materials to compare how they bake.
- Experiment with egg wash vs. corn syrup to see which creates a better moisture barrier.
- Adjust your oven rack placement to find the sweet spot for your crust.
- Play around with thickening agents to perfect the consistency of your filling.
The more you practice and tweak your approach, the more consistently delicious your homemade pot pies will turn out.
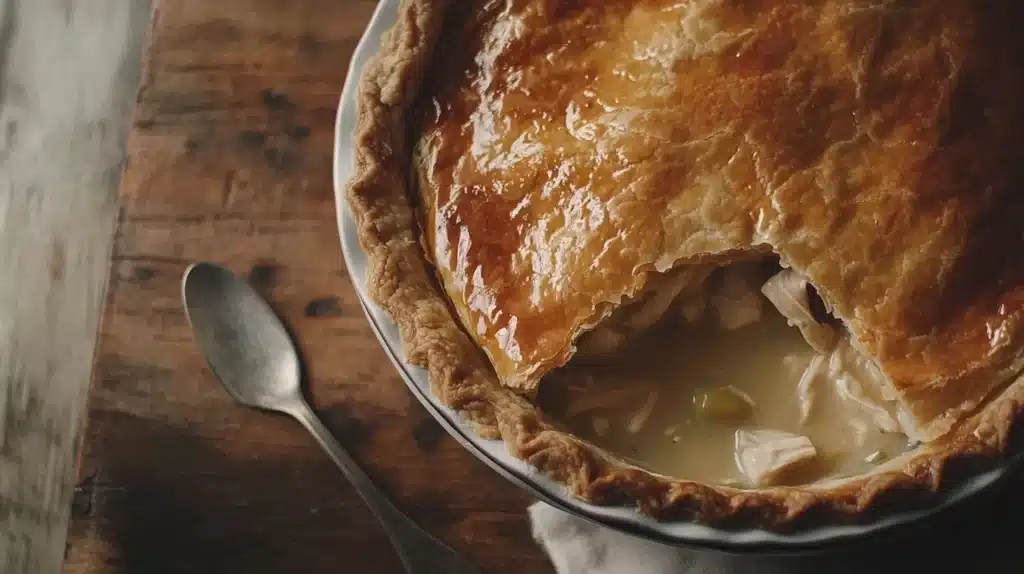
Final Thoughts on Achieving the Perfect Pot Pie Crust
A perfect pot pie isn’t just about the filling—it’s about achieving that ideal balance between a rich, creamy inside and a crisp, flaky crust. By understanding why soggy crusts happen and using the right techniques, you can bake a pot pie that’s as delicious on the bottom as it is on the top.
With a little practice, you’ll no longer have to wonder how to keep bottom pot pie from getting soggy. Instead, you’ll be pulling beautifully golden, firm-crusted pies out of the oven every time. So, gather your ingredients, preheat your oven, and start baking—your perfect pot pie awaits!