Few things are as comforting as a homemade chicken pot pie, but let’s be honest—dealing with a soggy bottom crust can ruin the whole experience. The big question is: Should you prebake the bottom crust for chicken pot pie, or is it just an extra step that’s not worth the trouble?
Some bakers swear by blind baking (another term for prebaking), claiming it keeps the crust crisp and golden. Others argue that with the right filling and baking method, you can skip it altogether. So, what’s the best approach?
This article breaks it all down: why prebaking might be a game-changer, reasons you might not need it, expert opinions, and step-by-step instructions to get it just right. By the end, you’ll know exactly what to do for your next homemade chicken pot pie!
For a simple and flavorful approach to making mini chicken pot pies, don’t miss this detailed recipe on mini chicken pot pies, which offers step-by-step instructions and tips.
What is Prebaking (Blind Baking) and How Does It Work?
Overview of Chicken Pot Pie and Its Crust Challenges
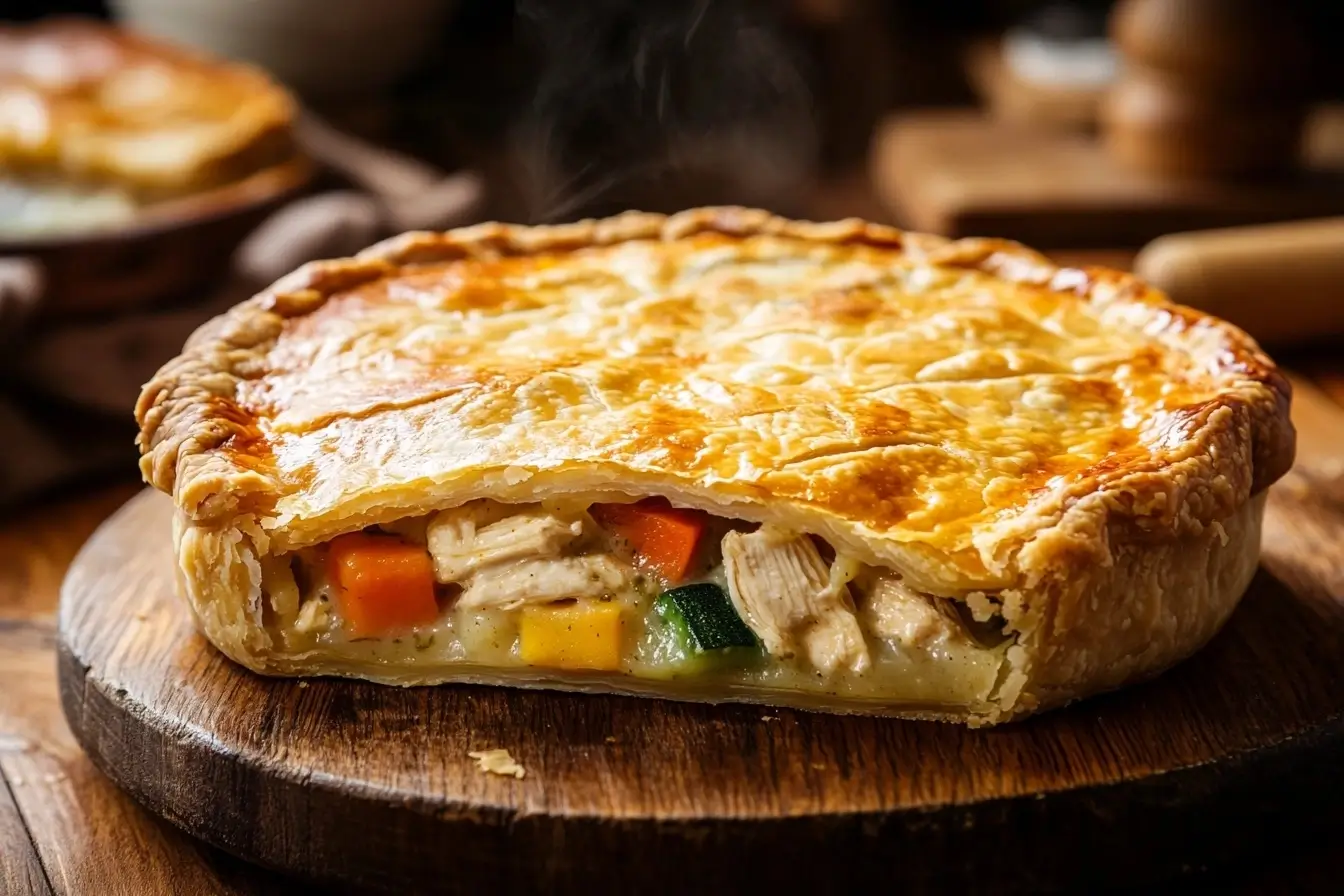
Chicken pot pie has been a staple comfort food for generations. It dates back to early American settlers, but similar dishes existed in Europe long before. The idea is simple: a flaky, buttery crust filled with a rich, creamy mixture of chicken, vegetables, and a savory sauce.
Over time, recipes have evolved, with different regions adding their own twists. Some versions use a double crust (both top and bottom), while others skip the bottom layer altogether, relying solely on a golden, flaky topping. But for those who love a sturdy, delicious base, achieving a crispy pie crust is essential.
However, one common problem many home cooks face is avoiding a soggy crust. When moisture from the filling seeps into the dough, it can leave the bottom layer soft and unappetizing. This leads to an important question: should I prebake bottom crust for chicken pot pie to prevent this issue? Many bakers say yes, as prebaking the pie crust can create a barrier that keeps it crisp.
The Role of Prebaking Pie Crust in Chicken Pot Pie
The crust isn’t just a vessel for the filling—it’s a huge part of what makes a chicken pot pie satisfying. When done right, it adds a delicate crunch that contrasts beautifully with the creamy interior.
If the crust is too soft or underbaked, it can turn the entire dish into a disappointment. That’s why many cooks debate: should I prebake bottom crust for chicken pot pie to ensure better results? Some argue that blind baking pie crust is the only way to guarantee a firm texture, while others believe that with the right techniques, you can achieve a crispy pie crust without the extra step.
The real question is: should I prebake bottom crust for chicken pot pie, or are there better ways to keep it crisp? While prebaking helps eliminate moisture issues, other tricks—such as using a metal pie pan or preheating the baking surface—can also make a difference.
Before weighing the pros and cons, let’s break down what prebaking actually means and whether it’s truly necessary. For those wondering, should I prebake bottom crust for chicken pot pie, understanding the process is the first step to making the right decision.
Understanding the Bottom Crust in Chicken Pot Pie
Composition and Function of Chicken Pot Pie Crust
The bottom crust of a chicken pot pie is more than just a base—it’s what holds everything together. A well-made crust should be flaky, sturdy, and flavorful, complementing the creamy filling without becoming mushy. When done right, the chicken pot pie crust provides structure, a satisfying texture, and a delicious buttery taste.
Ingredients Typically Used in Prebaking Pie Crust
A traditional chicken pot pie crust is made with:
- Flour – The foundation of any good crust, usually all-purpose for a balanced texture.
- Fat – Butter, shortening, or lard, which provide flakiness and richness.
- Cold Water – Helps bring the dough together without making it tough.
- Salt – Enhances the overall flavor.
- Egg Wash (Optional) – A light brushing before baking can add a barrier to moisture and improve crispness.
Some bakers experiment with alternative flours, adding herbs or even cheese for extra flavor, but the goal remains the same—a crispy pie crust that holds up against the filling.
Purpose of the Bottom Crust in Chicken Pot Pies
Why bother with a bottom crust when some recipes only use a top crust? A full pie crust delivers:
- Better texture – A crispy bottom crust provides contrast to the soft, creamy filling.
- More structure – Helps keep the pie from falling apart when served.
- Extra flavor – A well-baked pie crust adds richness to every bite.
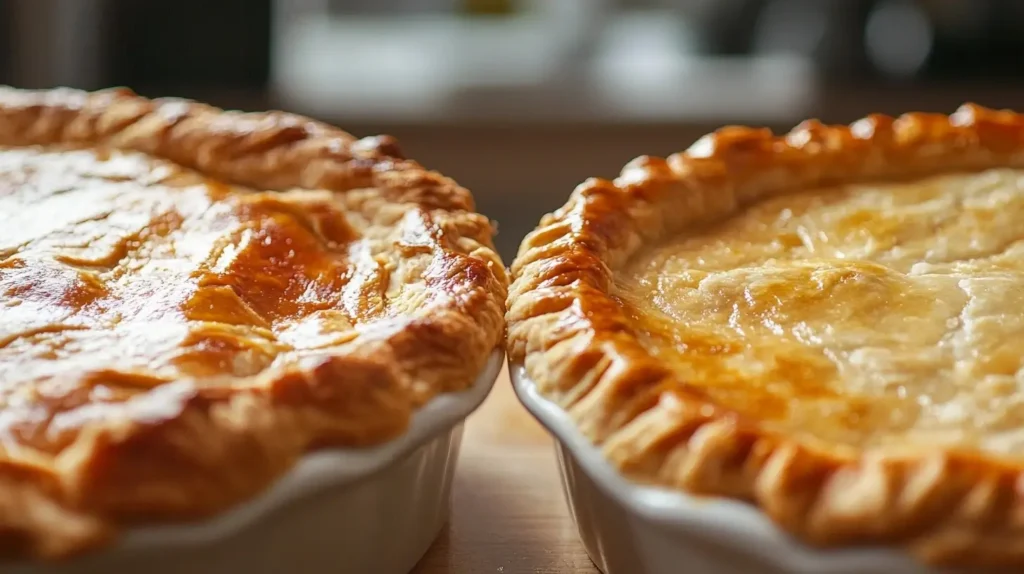
However, getting a crispy bottom pie crust isn’t always easy, and this is where many home bakers struggle.
Common Issues with Chicken Pot Pie Crusts
Even experienced cooks run into problems when trying to avoid a soggy crust. The most common complaints include:
- Soggy Bottom Crust – The filling releases moisture, soaking into the dough.
- Undercooked Dough – The top crust browns while the bottom stays pale and raw.
- Tough or Gummy Texture – Too much gluten development or excess moisture leads to a chewy, unpleasant bite.
So, what’s the solution? Many believe that prebaking the bottom crust is the key. But is it really necessary? Let’s take a closer look at blind baking pie crust and whether it’s the best approach.necessary? Let’s dive into the arguments for and against it.
What is Prebaking (Blind Baking)?
Definition and Process
Prebaking—also called blind baking—is the process of partially or fully baking a pie crust before adding the filling. This technique is widely used for pies with wet fillings, like quiches, custard pies, and, of course, chicken pot pie.
How Is Prebaking Done?
- Prepare the Dough – Roll out the pie crust and place it into a pie dish, ensuring it fits snugly without stretching.
- Dock the Dough – Use a fork to poke small holes in the bottom of the crust. This allows steam to escape and prevents air pockets from forming.
- Use Pie Weights – Line the crust with parchment paper or aluminum foil, then fill it with pie weights, dried beans, or rice. This keeps the dough from puffing up.
- Bake the Crust – Place it in a preheated oven (typically 375°F to 400°F) for about 10-15 minutes.
- Remove the Weights – Carefully take out the parchment paper and weights, then bake for another 5-10 minutes until it turns lightly golden.
Some recipes call for fully prebaking the crust (baking until completely crisp), while others only partially prebake it, finishing the bake after the filling is added.
Benefits of Prebaking
So why go through the extra step of prebaking?
- Prevents Sogginess – Since the crust is already baked, it doesn’t absorb as much moisture from the filling.
- Ensures a Crisp Bottom – A firm, golden crust provides a satisfying bite instead of a doughy mess.
- Creates a Stronger Structure – Helps the pie hold its shape when cut and served.
- Improves Flavor – A well-baked crust adds a rich, toasty depth to the overall dish.
However, some argue that prebaking isn’t necessary. Before you decide, let’s look at both sides of the debate.
Arguments for Prebaking the Bottom Crust
Many bakers insist that prebaking the bottom crust is the best way to avoid a soggy, undercooked base. While it does require an extra step, the benefits often outweigh the effort, leading to a crispy pie crust that holds up against the creamy filling.
Achieving a Crisp Texture with Prebaking Pie Crust
Nothing is more disappointing than cutting into a chicken pot pie and discovering a limp, doughy bottom crust. A properly prebaked crust, however, stays firm and flaky, creating a satisfying contrast to the rich, savory filling.
How does blind baking pie crust contribute to a firmer crust?
- It allows the crust to set before the filling is added, reducing the chance of excess moisture absorption.
- The dry heat of the oven removes excess moisture, ensuring a light, crisp bite instead of a chewy, dense layer.
- The crust browns evenly, rather than remaining pale and underbaked beneath the filling.
If you’ve ever had a chicken pot pie that held together perfectly on the plate rather than falling apart, chances are the bottom crust was either prebaked or handled with special care.
Preventing a Soggy Bottom in Chicken Pot Pie Crust
One of the biggest complaints about chicken pot pie crust is a bottom layer that turns into a soggy mess. This happens when the filling’s moisture seeps into the dough before it has a chance to bake through.
Blind baking pie crust helps reduce moisture absorption by:
- Creating a protective barrier – As the crust starts to bake, its structure sets, making it less absorbent.
- Allowing for additional crisping – The crust spends more time in direct heat, reducing the likelihood of a raw or gummy texture.
- Providing an opportunity to add extra moisture barriers – Brushing the crust with an egg wash, melted butter, or a thin layer of cheese after prebaking can further protect it from excess moisture.
Enhancing Flavor Through Prebaking Pie Crust
A well-baked crust isn’t just about texture—it also adds depth to the overall flavor of the pie. When prebaking the bottom crust, the dough has a chance to develop a rich, golden-brown color, which means:
- The butter or fat in the crust caramelizes, creating a nutty, slightly sweet undertone.
- The crust doesn’t taste raw, which can sometimes happen when a pie isn’t baked long enough.
- A toasted, flaky texture balances out the creamy filling, making each bite more enjoyable.
While prebaking pie crust clearly has its advantages, some argue that it’s an unnecessary step. Let’s take a look at the other side of the debate.. Let’s take a look at the opposing view.
Arguments Against Prebaking the Bottom Crust
While prebaking pie crust has clear benefits, not everyone is convinced it’s necessary. Some cooks find that with the right techniques, they can avoid a soggy crust without the extra work. Let’s break down the reasons why you might want to skip blind baking pie crust.
Time and Effort Considerations for Prebaking Pie Crust
Let’s be honest—prebaking the bottom crust adds another step to an already involved dish. Making a chicken pot pie from scratch takes time, and adding blind baking to the process means:
- An extra round of baking – You have to bake the crust first, let it cool slightly, then bake the pie again with the filling.
- More dishes to clean – You’ll need parchment paper, pie weights, or dried beans, which means extra cleanup.
- A longer total cook time – Instead of putting everything in the oven at once, you’re adding at least 15-20 minutes to the process.
For busy home cooks, skipping prebaking the pie crust can be a tempting shortcut, especially if there are other ways to prevent a soggy bottom crust.
Risk of Overbrowning in Prebaked Pie Crust
Another major concern with blind baking pie crust is that the crust can become too dark—or worse, burnt—by the time the pie is fully baked. This happens because:
- The bottom crust has already been exposed to direct heat before the filling is added, making it more prone to overcooking.
- Longer baking times mean the edges of the crust can burn, especially if they aren’t protected with foil or a pie shield.
- Some ovens have uneven heat distribution, which can cause parts of the crust to darken too quickly.
While using a foil shield or adjusting the oven temperature can help, some bakers prefer to avoid the hassle altogether.
Alternative Methods to Prevent a Soggy Pie Crust Without Prebaking
If you want to keep the bottom crust crisp without prebaking, there are a few tricks that can help:
- Use a metal pie dish – Metal conducts heat more efficiently than glass or ceramic, helping the bottom crust bake faster.
- Bake the pie on a preheated baking sheet – Placing the pie on a hot surface jump-starts the baking process, firming up the bottom crust.
- Thicken the filling – A too-runny filling releases more liquid, so adding a bit more flour, cornstarch, or reducing the sauce before assembling the pie can prevent excess moisture.
- Apply a barrier layer – Brushing the raw crust with an egg wash, melted butter, or even a thin layer of cheese can create a moisture-resistant shield.
So, do you really need to prebake the bottom crust? It depends on your preference and technique.
Expert Opinions and Culinary Perspectives
When it comes to the bottom crust debate, even professionals don’t always agree. Some chefs insist that prebaking is a must, while others believe that with the right technique, you can achieve a crisp crust without the extra step. Meanwhile, home bakers have their own tried-and-true methods, often based on trial and error. Let’s take a closer look at both perspectives.
Professional Chefs’ Recommendations
Many professional chefs swear by blind baking for pies with wet fillings, including chicken pot pie. According to top pastry experts:
- Prebaking eliminates the risk of a soggy crust – Chef Claire Saffitz, known for her meticulous baking techniques, recommends prebaking for custard and pot pies to create a firm base that won’t collapse under the weight of the filling.
- A hot oven and proper pie weights are key – Renowned pastry chef Stella Parks emphasizes that the right temperature and proper use of pie weights help the crust keep its shape and develop a crisp texture.
- Moisture control matters more than prebaking – Some chefs, like America’s Test Kitchen experts, argue that a well-thickened filling and the right pan choice (like metal instead of glass) can eliminate the need for prebaking.
However, even among professionals, there’s no universal rule. Some chefs recommend partial blind baking (just enough to set the crust), while others say baking the pie on a preheated surface achieves the same effect.
Home Cooks’ Experiences
Home bakers often have strong opinions based on experience. Many find that prebaking works, but others have discovered tricks that make it unnecessary.
What Home Bakers Are Saying:
- “I always prebake because I love a crispy crust. Otherwise, it’s just a mushy mess!” – Many bakers in online forums and recipe groups swear by prebaking, especially if they use a double crust.
- “I stopped prebaking after switching to a metal pan. My crust comes out perfect every time!” – Some home cooks find that using the right pie dish makes prebaking unnecessary.
- “A hot baking sheet under my pie dish changed everything.” – Another popular trick is placing the pie on a preheated metal sheet to help crisp up the bottom layer.
So, what’s the final verdict? There isn’t one! Both methods can work—it all comes down to preference, technique, and a little bit of kitchen experimentation.
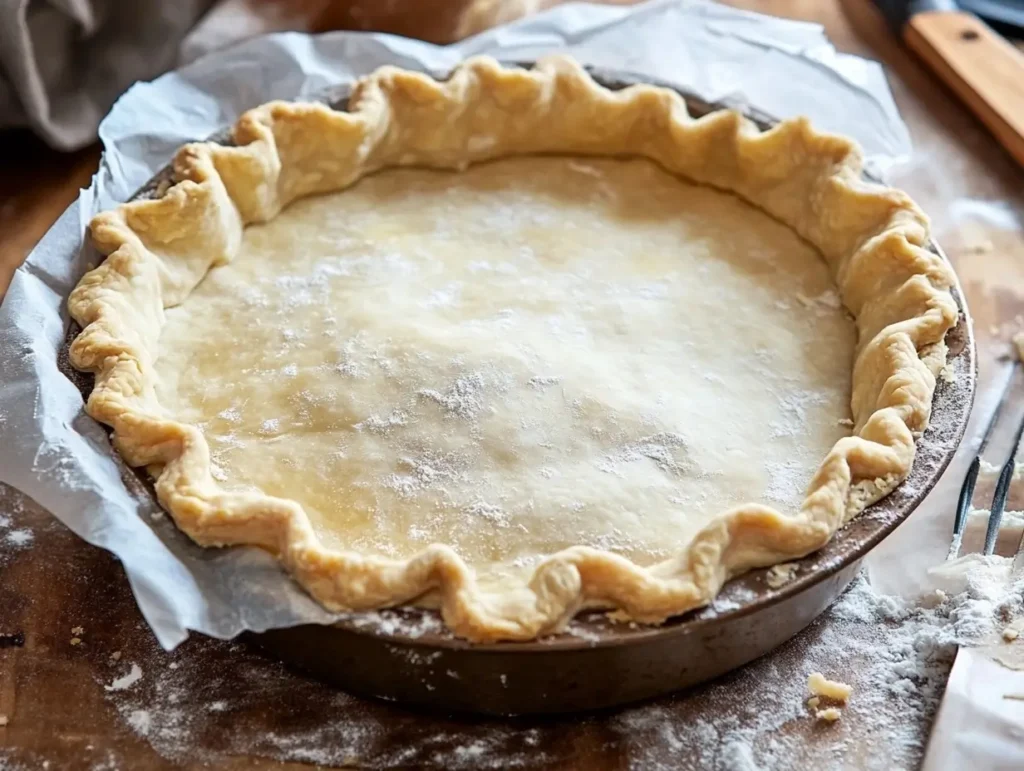
Step-by-Step Guide to Prebaking the Bottom Crust
If you’ve decided that prebaking is the way to go, following the correct steps is essential to achieving a flaky, golden-brown crust. Let’s break it down step by step.
Preparing the Dough
A great bottom crust starts with the right ingredients and proper mixing techniques.
Ingredients for a Classic Pie Crust:
- 2 ½ cups all-purpose flour – Provides structure.
- 1 cup (2 sticks) cold butter – Adds flakiness and flavor.
- 1 tsp salt – Enhances taste.
- 1 tsp sugar (optional) – Balances flavor.
- 6-8 tbsp ice-cold water – Helps bind the dough without overworking it.
Mixing the Dough:
- Cut the butter into cubes and place it in the freezer for 10 minutes. Cold butter ensures a flaky texture.
- Combine flour, salt, and sugar in a mixing bowl.
- Use a pastry cutter or food processor to cut in the butter until the mixture resembles coarse crumbs.
- Add ice water, one tablespoon at a time, mixing just until the dough comes together.
- Form the dough into a disc, wrap it in plastic, and refrigerate for at least 30 minutes.
Rolling and Fitting into the Pie Dish
Once chilled, it’s time to roll out the dough and fit it into the pie dish.
- Lightly flour a clean surface and rolling pin.
- Roll out the dough into a 12-inch circle, about ⅛ inch thick.
- Carefully transfer the dough to a 9-inch pie dish, pressing it gently into the bottom and sides.
- Trim excess dough, leaving about ½ inch overhang, then crimp or flute the edges as desired.
Docking and Weighing Down the Crust
This step is crucial to prevent the dough from puffing up during prebaking.
- Dock the dough by pricking the bottom with a fork. This allows steam to escape.
- Line the crust with parchment paper or aluminum foil.
- Fill with pie weights, dried beans, or uncooked rice. The weight keeps the crust from rising or shrinking.
Baking Time and Temperature
The right temperature ensures a crisp crust without burning.
| Step | Temperature | Time |
|---|---|---|
| Preheat oven | 375°F (190°C) | N/A |
| Bake with weights | 375°F (190°C) | 12-15 min |
| Remove weights & bake more | 375°F (190°C) | 5-7 min |
Post-Baking Considerations
- Let the crust cool slightly before adding the filling to avoid overcooking.
- For extra protection against moisture, brush the baked crust with an egg wash and return it to the oven for 2 more minutes.
- Store prebaked crusts properly – If not using immediately, cover loosely with foil and store at room temperature for up to 24 hours.
Now that your crust is perfectly crisp, let’s explore other ways to achieve a firm bottom crust without prebaking!
Alternative Techniques to Achieve a Crisp Bottom Crust
If prebaking feels like too much work, don’t worry—there are other ways to keep your chicken pot pie crust from turning into a soggy mess. These methods help create a firm, golden base without requiring an extra round of baking.
Using a Hot Baking Surface
One of the simplest ways to encourage even browning and crispness is to bake your chicken pot pie on a preheated surface.
Why It Works:
- A hot surface jump-starts the cooking process, helping the bottom crust firm up before the filling releases too much moisture.
- It ensures the crust bakes at the same rate as the rest of the pie, preventing undercooked dough.
How to Do It:
- Preheat a baking stone, pizza stone, or a sturdy metal baking sheet in the oven at 425°F (218°C) for at least 15 minutes before baking the pie.
- Once the oven is hot, place the unbaked pie dish directly on the heated surface.
- Bake as usual, keeping an eye on browning.
This technique mimics the effect of prebaking by exposing the crust to high heat right away, ensuring a crisp bottom layer.
Applying a Barrier Layer
Creating a barrier between the crust and the filling is another great way to keep it from getting soggy.
Barrier Options:
- Egg Wash – Brushing a light layer of beaten egg onto the raw crust before filling helps create a moisture-resistant seal.
- Breadcrumbs or Crushed Crackers – Sprinkling a thin layer on the dough absorbs excess liquid.
- Grated Cheese – A light dusting of Parmesan or cheddar melts into the crust, adding both flavor and protection.
How to Apply It:
- For egg wash – Beat one egg and brush a thin layer over the crust before adding the filling.
- For breadcrumbs or cheese – Sprinkle a small amount evenly across the base.
- Let it set – If using an egg wash, bake the crust for 2-3 minutes before adding the filling for extra crispness.
Adjusting Filling Consistency
Even the best bottom crust will struggle if the filling is too wet. A thick, well-balanced filling helps minimize liquid seepage and improves the overall texture of the pie.
How to Keep the Filling from Making the Crust Soggy:
- Use a roux – Cooking butter and flour together before adding liquid thickens the filling.
- Let the filling cool slightly before adding it to the crust. Hot fillings release more steam, which can lead to excess moisture.
- Avoid excess broth or cream – If the mixture looks too runny, simmer it longer to reduce liquid content.
These techniques can help you achieve a crisp, golden bottom crust—without prebaking! But what about different crust types? Let’s explore how recipe variations affect the bottom crust.
Recipe Variations and Their Impact on the Bottom Crust
Not all chicken pot pies are created equal! The type of crust you use and how you assemble the pie can greatly affect whether the bottom crust turns out crisp or soggy. Let’s look at how different variations impact the final result.
Puff Pastry vs. Traditional Pie Dough
One of the biggest choices in chicken pot pie is whether to use a classic pie dough or opt for puff pastry. While both are delicious, they behave differently in the oven.
Traditional Pie Dough:
- Made with flour, butter, and water, this crust is sturdy and holds up well to fillings.
- Can be prebaked for extra crispness, but it’s not always necessary.
- Provides a firm, slightly flaky texture.
Puff Pastry:
- Made with layers of butter and dough, which puff up when baked.
- Delicate and light but more prone to absorbing moisture.
- Works better as a top crust only since it tends to become soft when used as a bottom crust.
If using puff pastry for a full pie, it’s best to bake the filling separately, then place the pastry on top near the end of baking to keep it crisp.
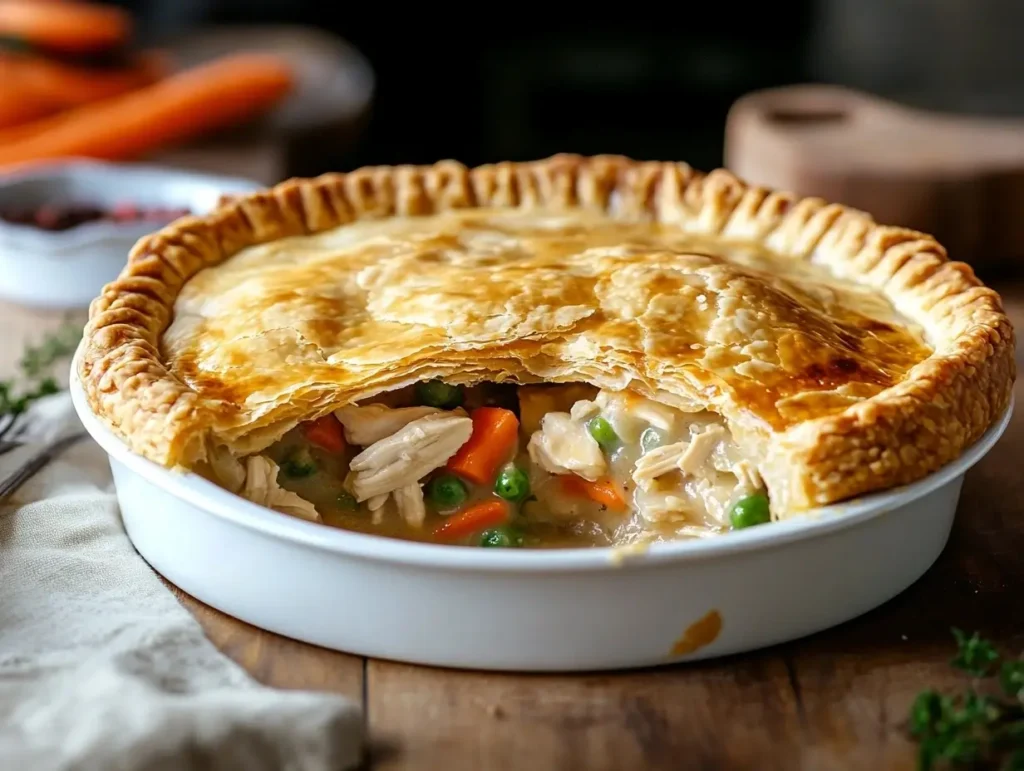
Single Crust vs. Double Crust Pot Pies
The number of crust layers also plays a role in texture and structure.
Single Crust Pot Pie:
- Only a top crust, which stays flaky and golden.
- No worries about a soggy bottom crust.
- Great for a lighter, less dough-heavy pie.
Double Crust Pot Pie:
- Uses both a top and bottom crust, creating a classic pie experience.
- More prone to a soft bottom crust unless baked properly.
- Works best when using prebaking or alternative crisping techniques.
If you love the taste of a double crust but don’t want to deal with sogginess, try brushing the bottom crust with an egg wash before filling it.
Gluten-Free and Alternative Flours
For those avoiding gluten, making a crisp bottom crust can be tricky since gluten-free doughs lack the elasticity of wheat-based crusts. However, using a blend of gluten-free flours—such as almond, rice, or tapioca—can improve structure. Some bakers also explore healthier flour alternatives for dietary reasons. You can find more insights on nutritional flour options here.
Common Issues with Gluten-Free Pie Crusts:
- More fragile dough – Without gluten, the dough can be crumbly and harder to roll out.
- Less flakiness – Many gluten-free flours absorb more moisture, making it harder to get a crisp texture.
Solutions for Gluten-Free Baking:
- Use a blend of gluten-free flours (like almond, rice, and tapioca) for better structure.
- Add a binding agent like xanthan gum to improve elasticity.
- Prebake the crust at a slightly lower temperature (around 350°F) to prevent over-browning.
No matter which variation you choose, making a crisp bottom crust is possible with the right approach. But what about common questions people ask about prebaking? Let’s dive into the most frequently asked questions next!
Frequently Asked Questions (FAQs)
Many home cooks struggle with achieving the perfect bottom crust for their chicken pot pie. Below are answers to some of the most common questions about prebaking, baking times, and keeping the crust crisp.
How do you keep the bottom crust of a chicken pot pie from getting soggy?
There are several ways to prevent a soggy bottom crust:
- Prebake (blind bake) the crust – This ensures it sets before the filling is added.
- Use a hot baking sheet – Placing the pie on a preheated surface helps crisp up the base.
- Thicken the filling – Too much liquid in the filling can seep into the crust, making it soft.
- Apply a barrier layer – Brushing the crust with an egg wash, melted butter, or a light layer of breadcrumbs can reduce moisture absorption.
- Bake in a metal pie pan – Metal conducts heat better than glass or ceramic, leading to a firmer crust.
Want to ensure your chicken pot pie crust stays crisp? Check out this expert guide for detailed techniques on preventing a soggy bottom.
What to serve with mini chicken pot pies?
Mini chicken pot pies are a great meal on their own, but they pair well with:
- Simple green salad – A light vinaigrette balances the rich, creamy filling.
- Roasted vegetables – Carrots, Brussels sprouts, or asparagus add color and texture.
- Mashed potatoes – A hearty side that complements the savory flavors.
- Fruit salad – A fresh and slightly sweet contrast to the pie’s buttery crust.
How to make mini chicken pot pies?
Mini chicken pot pies are easy to make and perfect for individual servings. Here’s a quick method:
- Prepare your pie dough – Roll it out and cut into circles to fit muffin tins.
- Make the filling – Use cooked chicken, sautéed vegetables, and a thickened creamy sauce.
- Assemble the pies – Press the dough into muffin cups, fill with the mixture, and top with another layer of dough or puff pastry.
- Bake at 375°F (190°C) for 20-25 minutes until golden brown.
- Let cool slightly before serving to allow the filling to set.
How long to bake mini chicken pot pies?
Mini versions bake much faster than a full-size chicken pot pie. Generally, 375°F (190°C) for 20-25 minutes should give you a golden, flaky crust. If using store-bought puff pastry, check package instructions for baking times.
How do you get a crispy crust on the bottom of a pie?
- Use a metal or dark-colored pan – It conducts heat better, cooking the crust evenly.
- Preheat your baking sheet – Place the pie directly on a hot tray for better browning.
- Brush with an egg wash – This creates a seal that prevents moisture from seeping in.
- Bake at the right temperature – A hotter oven (375-400°F) helps crisp the crust without overbaking the filling.
For more expert tips and techniques, check out How Do You Get a Crispy Crust on the Bottom of a Pie?.
How do you keep the bottom of a pot pie from getting soggy?
- Avoid extra liquid in the filling—reduce sauces before assembling the pie.
- Bake the pie on the lower rack of the oven for direct heat exposure.
- Let the pie cool slightly before slicing to allow the crust to firm up.
For more expert tips and techniques, check out How to Keep the Bottom of a Pot Pie from Getting Soggy.
Should I bake the bottom pie crust first?
Prebaking isn’t always necessary, but it helps if you want a crisp bottom crust. If you’re using a very thick filling or baking at a lower temperature, prebaking can ensure the crust stays firm and golden. However, using techniques like a hot baking sheet and thicker filling can help achieve the same result without blind baking. If you’re looking for a detailed breakdown of when and why to blind bake a pie crust, check out Should I Bake the Bottom Pie Crust First? The Ultimate Guide to Perfect Pies.
Conclusion
Weighing the Pros and Cons
So, should I prebake bottom crust for chicken pot pie? That depends on your priorities in baking. Some home cooks swear by blind baking for a guaranteed crisp crust, while others prefer alternative methods to save time and effort.
Advantages of Prebaking:
- Should I prebake bottom crust for chicken pot pie if I want to avoid sogginess? Yes, prebaking helps set the crust before the filling is added, preventing excess moisture from seeping in.
- A crisp, golden-brown base adds texture and appeal, making the pie structurally sound.
- The extra bake time enhances the dough’s flavor, giving it a rich, toasty depth.
Disadvantages of Prebaking:
- Extra time and effort are required, which might not be ideal for quick meals.
- Overbrowning can occur if the crust isn’t monitored closely during the final bake.
- Some alternative methods, like preheating a baking sheet or brushing with an egg wash, may eliminate the need for prebaking.
Making an Informed Decision
Should I prebake bottom crust for chicken pot pie every time? Not necessarily. If you’re after a crispy pie crust and don’t mind the extra step, prebaking is a solid choice. However, if convenience matters more, other techniques—such as thickening the filling, adjusting the baking method, or using a metal pie pan—can be just as effective.
At the end of the day, should I prebake bottom crust for chicken pot pie depends on your recipe, preferences, and available time. Some bakers achieve a perfect crust without prebaking, while others rely on it for consistent results. Experiment with different methods and find what works best in your kitchen.
Next time you’re making chicken pot pie, ask yourself: should I prebake bottom crust for chicken pot pie, or will one of these alternative techniques do the trick? Either way, a perfectly baked pie is within reach!